

Before you install a major macOS update, take a proper backup. It is the least exciting part of updating your Mac, but it is the part that saves you if an install fails, an app behaves badly or a file goes missing afterwards. Before installing macOS 27, use the Golden Gate install guide, and if the app grid is gone afterward, see where Launchpad went.
For most people, Time Machine is the easiest option. It is built into every Mac and backs up your apps, photos, documents, accounts and settings to an external drive.

What you need before you start
You need an external drive that can connect to your Mac through USB-C, Thunderbolt or an adapter. Apple recommends a backup disk with at least twice the storage capacity of your Mac. So, if your Mac has 512GB of storage, a 1TB external drive is a sensible minimum.
If your drive contains important files already, do not select it blindly. Time Machine may need to erase and format a new drive before using it as a backup disk.
How to back up your Mac with Time Machine
For most people, Time Machine is the easiest way to back up a Mac before a macOS update. It backs up apps, photos, documents, accounts and settings to an external drive.
- Connect your external drive directly to your Mac.
- Click the Apple menu in the top-left corner and open System Settings.
- Click General, then Time Machine.
- Choose Add Backup Disk.
- Select the external drive you want to use and follow the prompts.
- Choose encryption if you want the backup protected with a password.
- Wait for the first backup to complete before installing macOS.
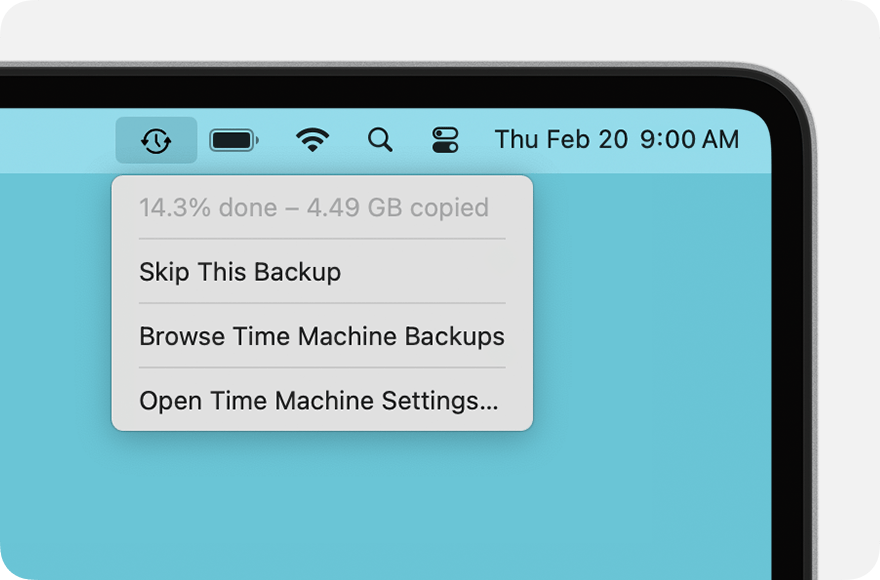
The first Time Machine backup can take a while, especially if you have years of photos, downloaded files and large creative projects. You can keep using your Mac while it runs, but do not disconnect the drive.
How to check that the backup is complete
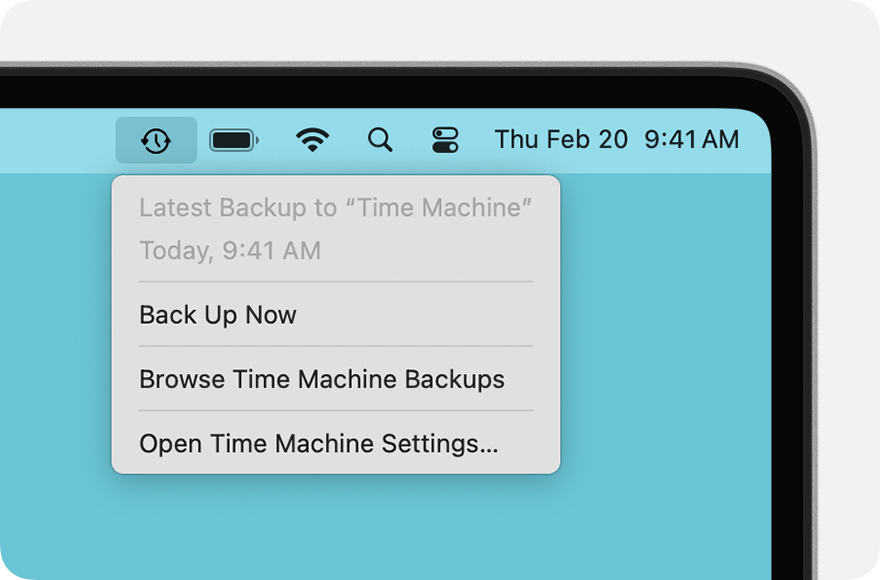
Open Time Machine in System Settings and look for the latest backup time. If it says the backup is in progress, let it finish. You can also look for the Time Machine icon in the menu bar, where macOS will show the most recent backup.
Open a Finder folder with a file you care about, then enter Time Machine and make sure you can see an older version of that file. This checks that the backup contains a file you may need to restore.
Should you use iCloud instead?
iCloud Drive is useful, but it is not a replacement for a full Time Machine backup. It keeps selected files in sync across devices. Time Machine is the better safety net before a macOS update because it can restore your apps, accounts, settings and files if something goes wrong.
Three things to do before installing macOS
- Keep the backup drive connected until Time Machine confirms the latest backup is complete.
- Make sure your Mac is plugged into power and has enough free storage for the update.
- Check that essential work apps, audio plugins and accessories support the new macOS version.
What if your Mac will not start after the update?
A Time Machine backup gives you options. You can restore individual files, migrate your data to another Mac or restore the Mac from Recovery if you need to start again.
- SourceApple: Back up your Mac




One response to “How to Back Up Your Mac Before Updating macOS: Time Machine Guide”
[…] you install it, check whether your Mac is supported and make a Time Machine backup. Here is what you need to know about the macOS 27 update. After installing, Launchpad is gone and […]