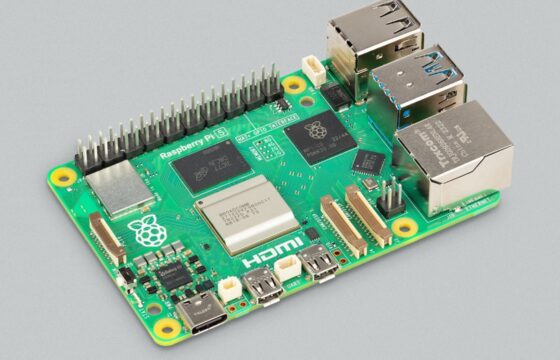
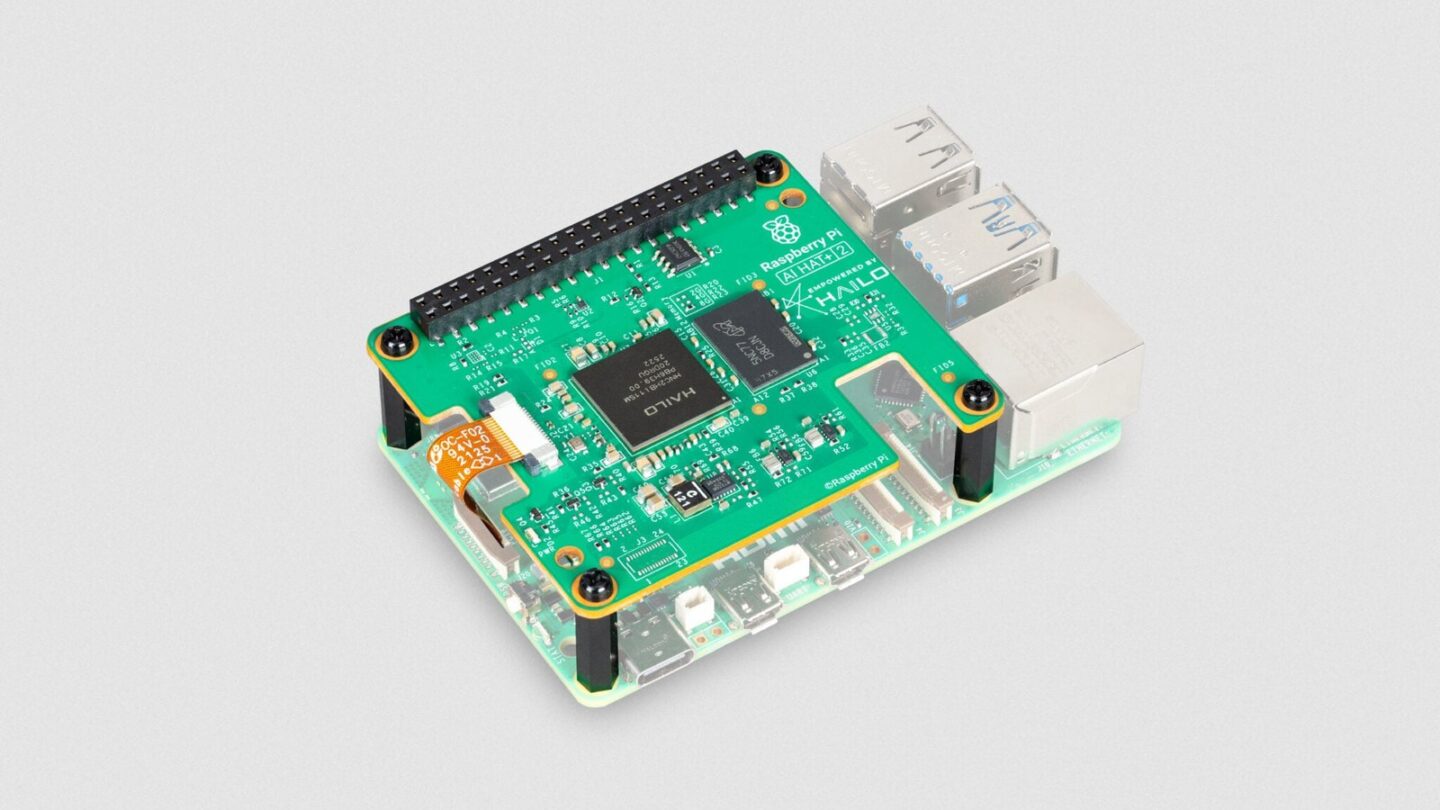
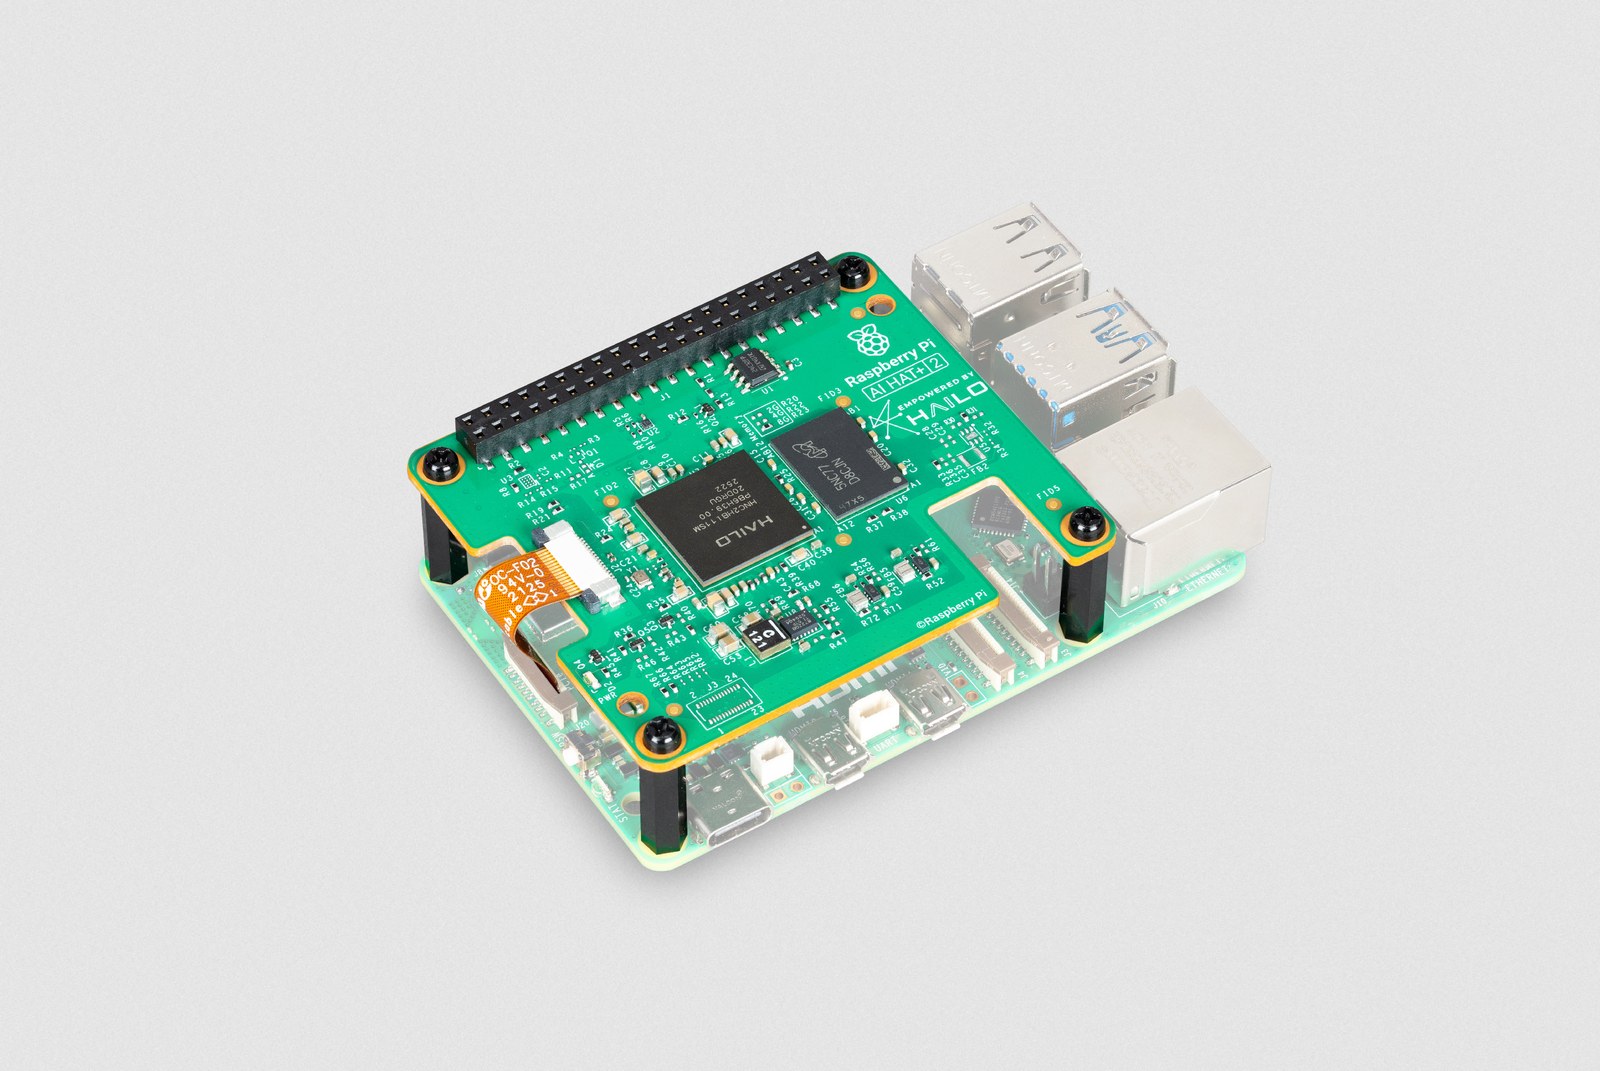
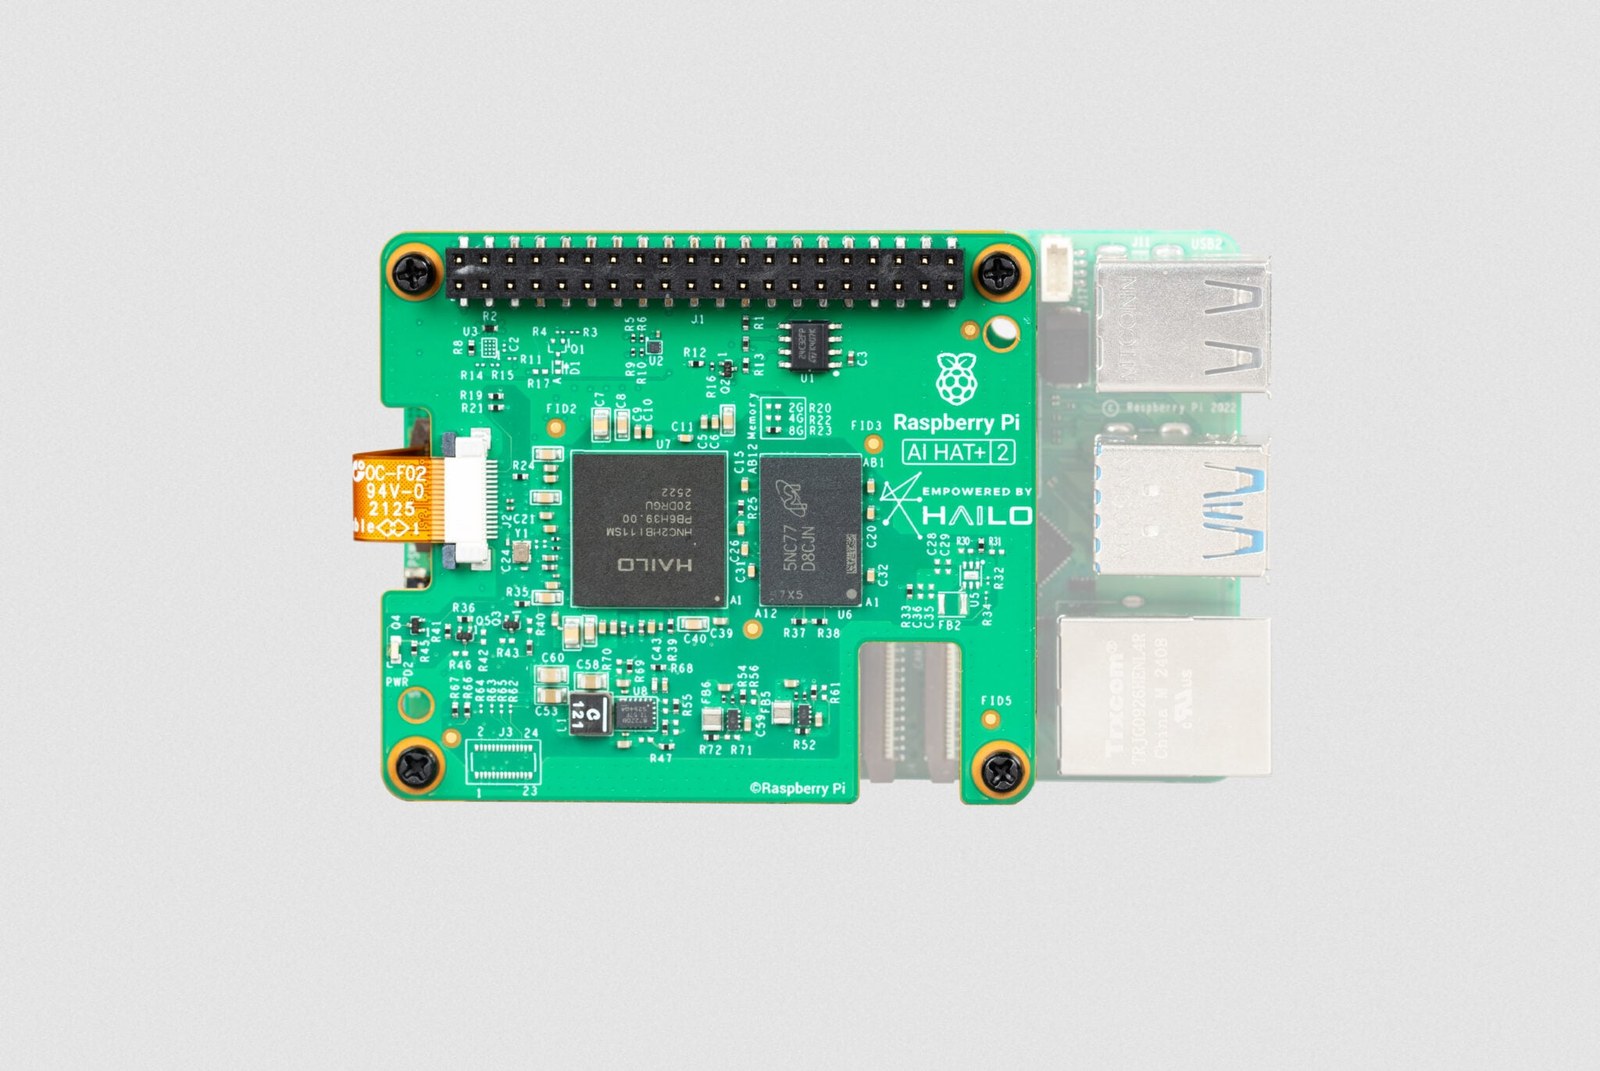
The Raspberry Pi AI HAT+ 2 brings local language models to Raspberry Pi 5. It adds a Hailo-10H neural processor with 40 TOPS of INT4 performance and 8 GB of its own RAM, so generative models can run on the HAT instead of fighting the Pi for memory. You can assemble the board, install the Hailo software and run a model through its local API. Raspberry Pi also documents an optional Open WebUI chat interface.
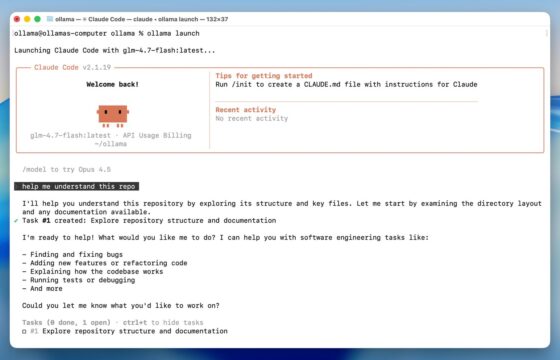
If you already run AI models locally with Ollama on a laptop or mini PC, the shape of this setup will feel familiar: a local API on port 8000, model pulls, and chat requests. The difference is that inference is meant to land on the Hailo-10H, and the package names and model zoo are Hailo-specific rather than stock Ollama.
What you need before you start
Official AI software docs require a Raspberry Pi 5 with a 64-bit Raspberry Pi OS Trixie install. Older Pi boards are out of scope for this HAT path. You also need the AI HAT+ 2 itself, not the earlier AI HAT+ or AI Kit, if your goal is large language models.
Gather this kit before you open the screwdriver:
- Raspberry Pi 5 (any RAM size works for the OS; the HAT carries 8 GB of its own memory for GenAI)
- Raspberry Pi AI HAT+ 2 (Hailo-10H), including the supplied spacers, screws, GPIO stacking header, PCIe ribbon, and heatsink
- Raspberry Pi Active Cooler for the Pi 5 SoC (recommended in the assembly guide)
- Official or quality 27 W USB-C power supply, microSD or NVMe boot media, and a network connection for package downloads
- A Phillips screwdriver and a clear desk. Power must be disconnected while you assemble
One PCIe reality check matters before you buy accessories. The AI HAT uses the same Raspberry Pi 5 PCIe connector as an M.2 HAT+. You cannot stack both on the same port at once. If your everyday boot disk is an NVMe HAT, plan a different layout (USB boot, SD boot, or a separate machine) before you commit the PCIe lane to the AI HAT+ 2.
Raspberry Pi lists the AI HAT+ 2 at $200. India pricing depends on the approved reseller, so check the current listing before buying. The Raspberry Pi 5, power supply and storage are additional purchases if you do not already have them.
AI HAT+ vs AI HAT+ 2: which one runs local LLMs
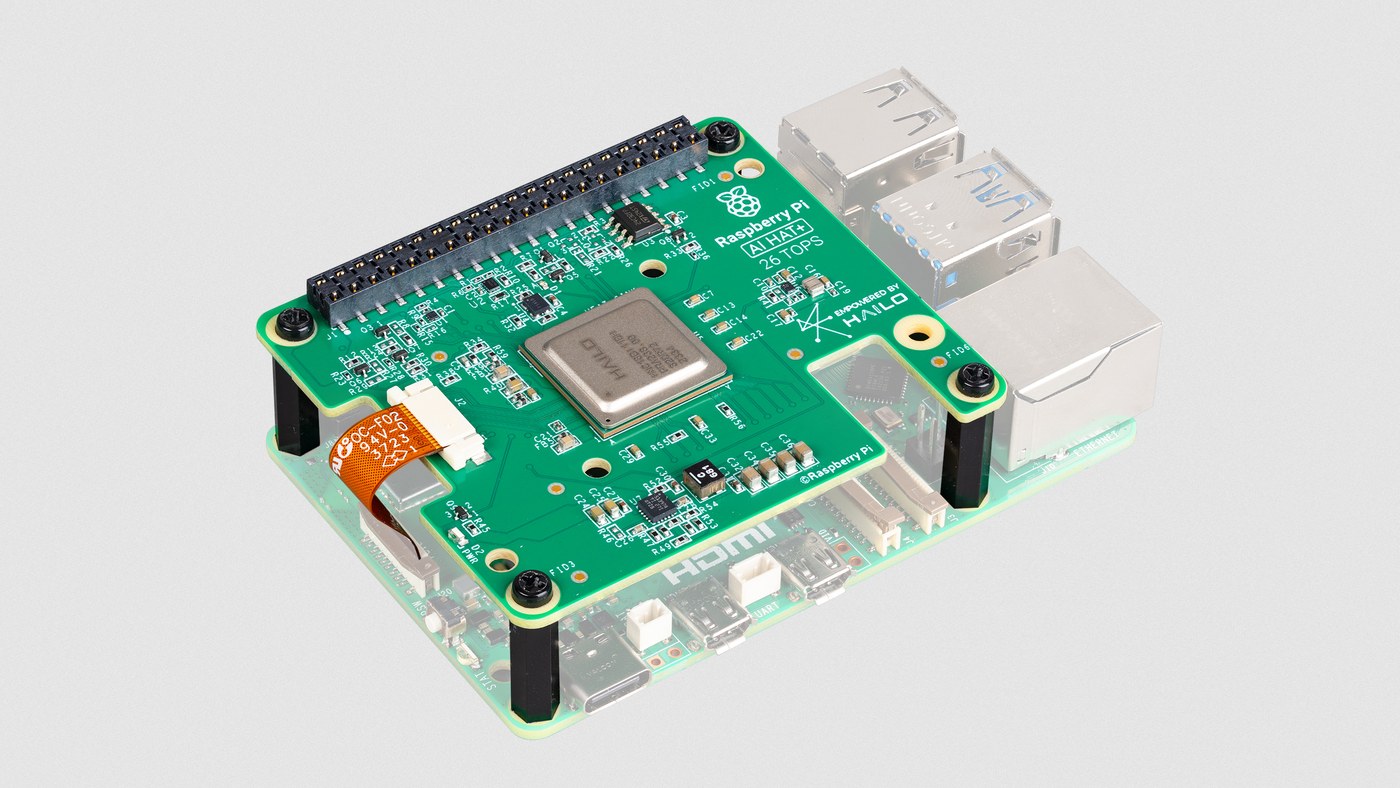
Raspberry Pi’s accessory docs draw a clean line. Both boards accelerate vision models on a Pi 5. Only AI HAT+ 2 adds generative AI, including LLMs and vision-language models. The earlier AI HAT+ keeps using the Pi’s system RAM. The AI HAT+ 2 brings 8 GB of onboard memory so models up to roughly six billion parameters can live next to the NPU.
| Feature | AI HAT+ | AI HAT+ 2 |
|---|---|---|
| Hailo NPU | Hailo-8L (13 TOPS INT8) or Hailo-8 (26 TOPS INT8) | Hailo-10H (40 TOPS INT4) |
| Onboard RAM | None (uses Pi 5 RAM) | 8 GB dedicated |
| LLM / VLM support | Not supported | Supported |
| Typical workloads | Object detection, pose, segmentation, robotics vision | Vision plus local GenAI chat and related models |
| apt meta-package | hailo-all | hailo-h10-all |
| PCIe Gen 3 | Automatic on HAT+ | Automatic on HAT+ 2 |
Those apt packages cannot sit side by side. If you previously installed hailo-all for an AI Kit or AI HAT+, remove that stack before installing hailo-h10-all for the AI HAT+ 2. Mixing them is a common way to end up with a board that never shows up in hailortcli.
PCIe Gen 3 is automatic for AI HAT+ and AI HAT+ 2. Only the older AI Kit path asks you to flip Gen 3 manually in raspi-config or config.txt. Skip that toggle for HAT+ 2 unless you have a separate reason to edit PCIe settings.
How to assemble the Raspberry Pi AI HAT+ 2
Shut the Pi down and unplug power before any of this. The assembly sequence in Raspberry Pi’s AI HAT docs is Active Cooler first, HAT heatsink second, then spacers, GPIO header, and PCIe ribbon.
Step 1: Mount the Active Cooler on the Pi 5
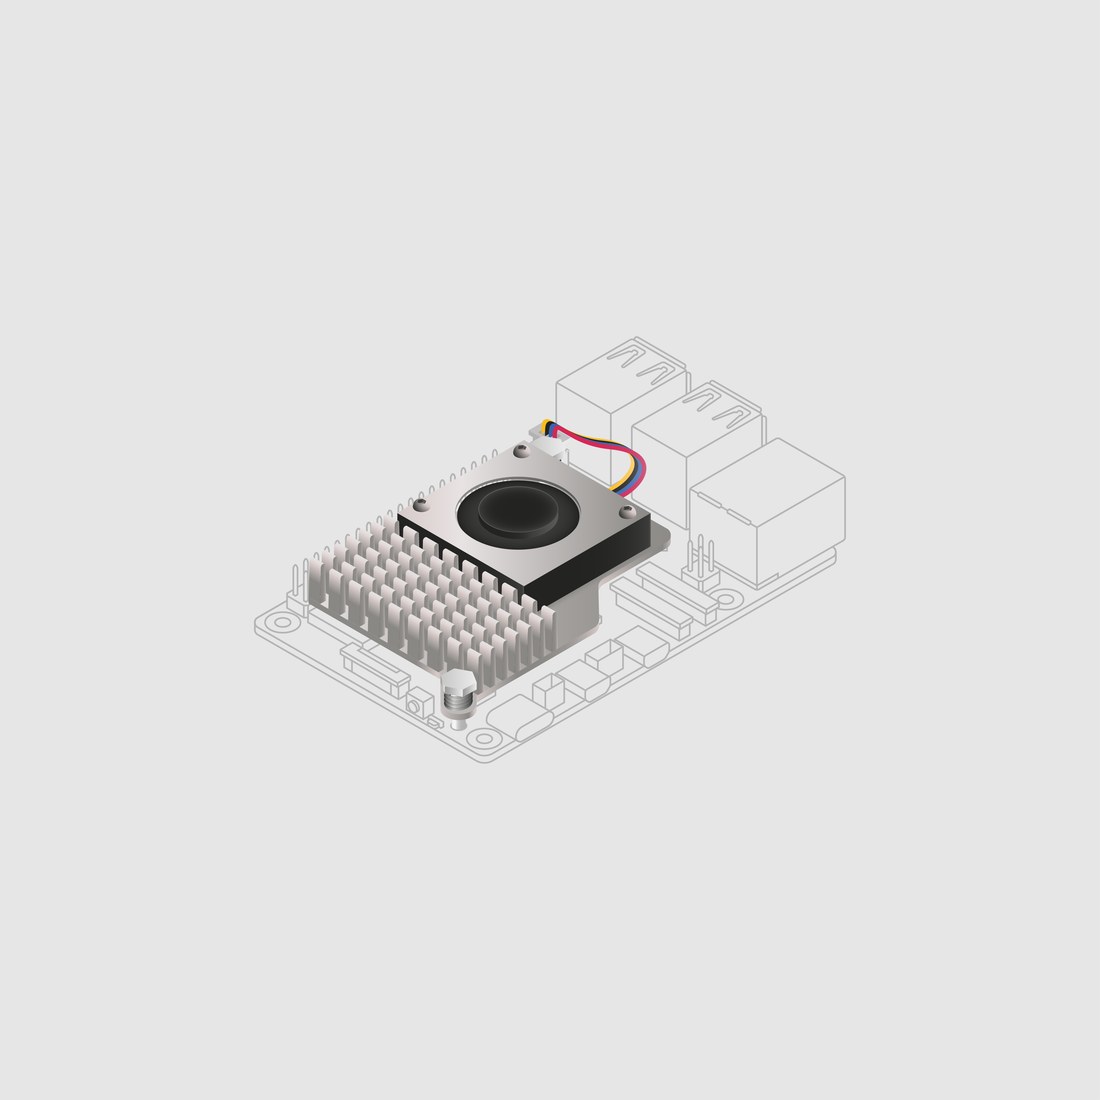
Peel the protective film from the cooler’s thermal pads. Align the two white push pins with the dedicated heatsink holes so the pads sit on the wireless radio, SoC, and PMIC. Press until the pins click, then plug the fan cable into the Pi’s fan header. Raspberry Pi recommends leaving the cooler in place afterward because reuse can damage pins and pads.
Step 2: Fit the AI HAT+ 2 heatsink
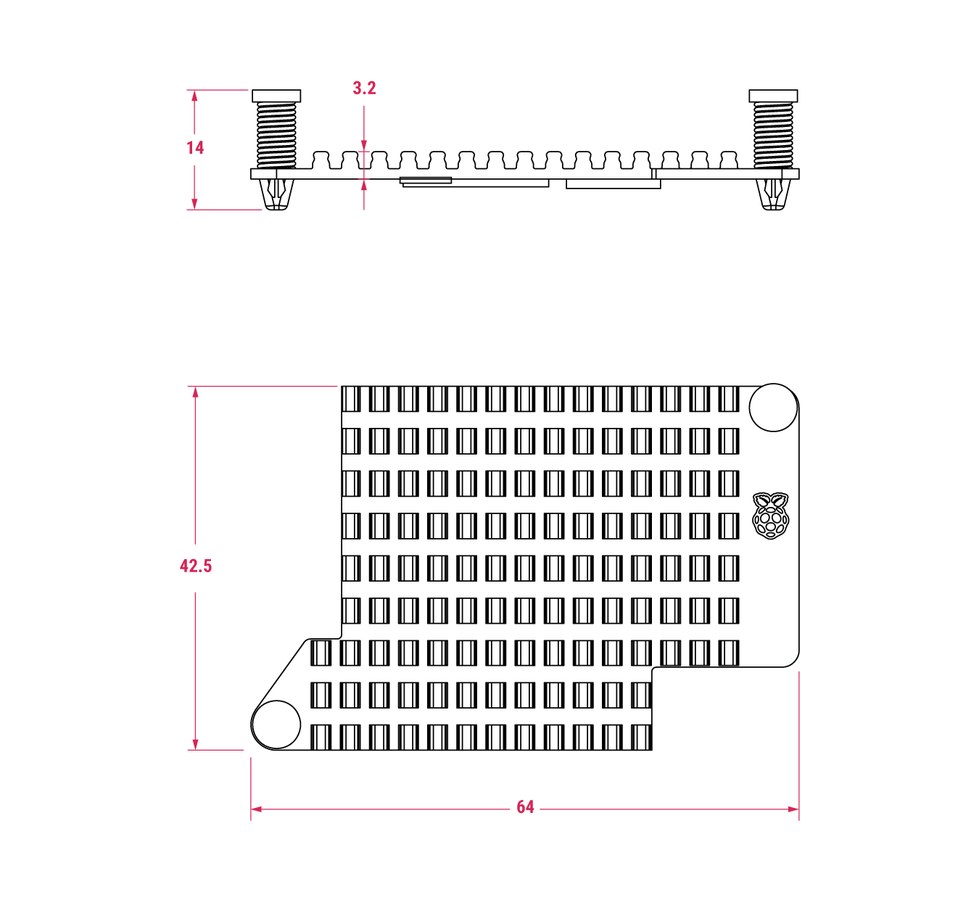
The HAT ships with its own heatsink. It is optional on paper and strongly recommended for sustained GenAI loads. Peel the pad covers, align the two black push pins with the diagonal heatsink holes, and click them home so the pads cover the power regulator, Hailo-10H, and SDRAM. Do not treat this as a remove-and-replace part; the pads degrade after the first fit.
Step 3: Spacers, GPIO header, and PCIe ribbon
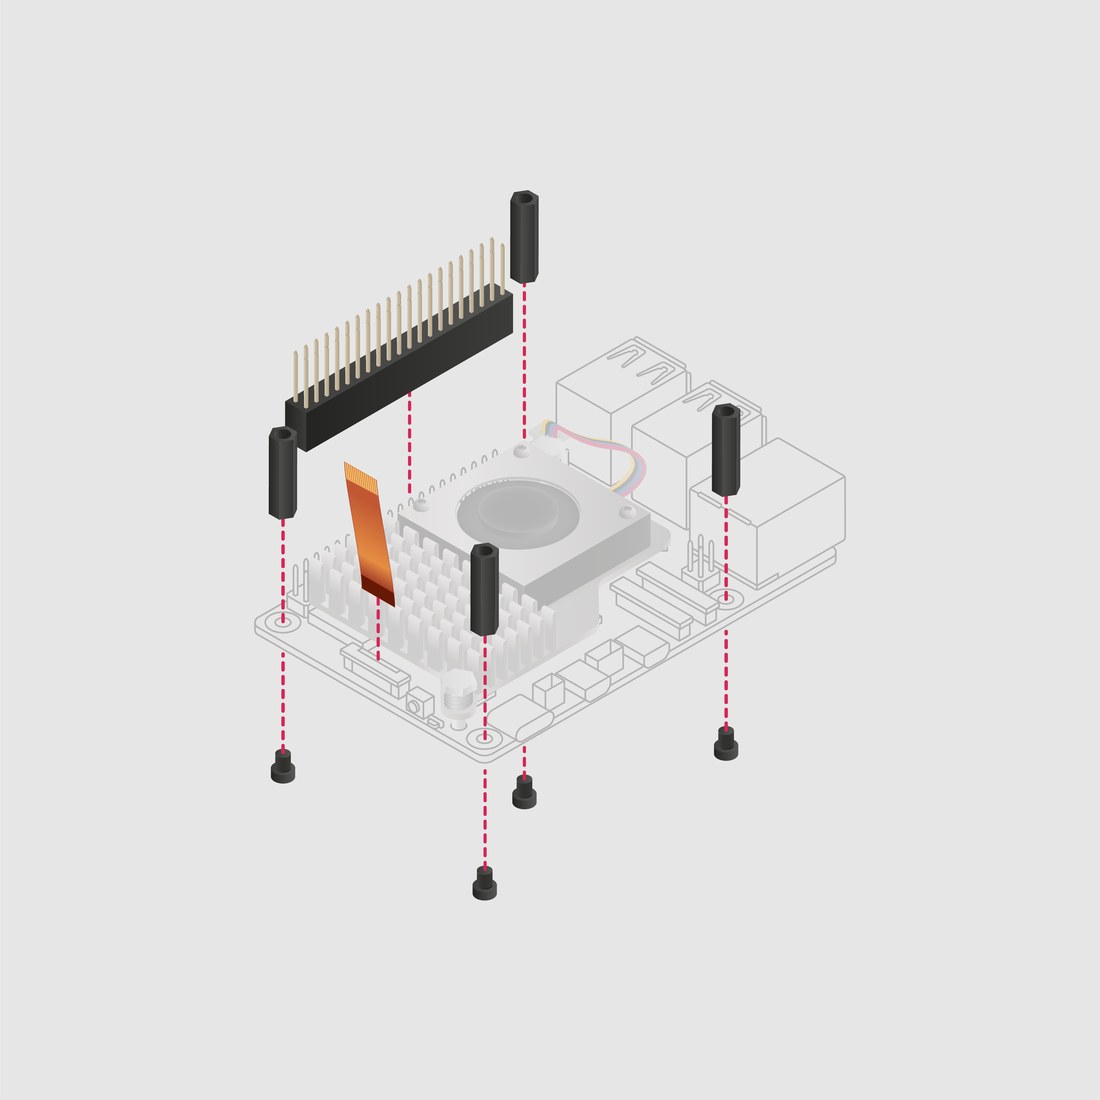
- Screw the four threaded spacers into the Pi’s yellow mounting holes with the longer screws.
- Press the GPIO stacking header onto the 40-pin header until it seats fully. Orientation only matters in the sense that every pin must line up.
- Release the PCIe ribbon from the HAT connector by sliding the retaining clips outward, then seat the other end into the Pi 5 PCIe connector with metal contacts facing inward toward the USB ports. Lock the clip evenly.
- Lower the HAT onto the spacers with components facing up and fix it with the shorter screws.
- Insert the free end of the ribbon into the HAT PCIe connector and lock the clips. Check both ends for a straight, even seat before you apply power.
Power up only after both ribbon ends feel locked. A half-seated FPC is the usual reason a brand-new HAT never appears on the PCIe bus.
If identify still fails after a clean cable reseat, power down again and confirm the GPIO stacking header did not lift when you tightened the HAT screws. A tilted board can stress the FPC. Also confirm you are on Pi 5 hardware; the AI HAT+ family is documented for Raspberry Pi 5, not earlier boards with different PCIe or power designs.
Update Raspberry Pi OS and install hailo-h10-all
Boot into 64-bit Raspberry Pi OS Trixie. Bring packages and EEPROM firmware current, then reboot before you touch Hailo packages:
sudo apt update
sudo apt full-upgrade -y
sudo rpi-eeprom-update -a
sudo reboot
After the reboot, install DKMS and the Hailo-10 meta-package for AI HAT+ 2:
sudo apt install dkms
sudo apt install hailo-h10-all
sudo reboot
When the Pi returns, identify the accelerator:
hailortcli fw-control identifyYou want a successful identify dump for the Hailo device on PCIe. Empty serial or product name fields can appear on HAT hardware and are called out as expected in the docs. If the command fails entirely, recheck the ribbon, confirm you installed hailo-h10-all rather than hailo-all, and skim dmesg | grep -i hailo for probe or firmware load errors.
At this point vision demos through rpicam-apps are also in reach if you attach a Camera Module. This article stays on the LLM path. The same driver stack underpins both.
Install the Hailo GenAI model zoo and start hailo-ollama
Local LLMs need the Hailo GenAI Model Zoo package in addition to the driver meta-package. Raspberry Pi’s AI software guide points at version 5.1.1 of the arm64 Debian package on Hailo’s public download server. That pairing matters: the hailo-h10-all package in Raspberry Pi’s Trixie repository installs HailoRT 5.1.1, and the model zoo has to match the HailoRT version. Follow the version linked by Raspberry Pi and confirm it matches the HailoRT package on your system. Download it on the Pi, then install with dpkg:
curl -fL -O https://dev-public.hailo.ai/2025_12/Hailo10/hailo_gen_ai_model_zoo_5.1.1_arm64.deb
sudo dpkg -i hailo_gen_ai_model_zoo_5.1.1_arm64.deb
That package provides the hailo-ollama server and the curated models built for Hailo-10H. Start the server in its own terminal and leave it running:
hailo-ollamaIn a second terminal, list what the server can pull:
curl --silent http://localhost:8000/hailo/v1/listPull a listed model. The docs use a placeholder tag; qwen2:1.5b is the worked example:
curl --silent http://localhost:8000/api/pull \
  -H 'Content-Type: application/json' \
  -d '{ "model": "qwen2:1.5b", "stream" : true }'
Send a chat completion once the pull finishes:
curl --silent http://localhost:8000/api/chat \
  -H 'Content-Type: application/json' \
  -d '{"model": "qwen2:1.5b", "messages": [{"role": "user", "content": "Translate to French: The cat is on the table."}]}'
A JSON reply with assistant content means the stack is alive end to end: HAT, drivers, model zoo, and API. Keep hailo-ollama running whenever you want the API or Open WebUI available.
Which launch models fit on AI HAT+ 2
Raspberry Pi’s launch post listed these sample LLMs for day-one installs. Sizes sit in the small edge band, not the hundreds-of-billions class you see in cloud chat products:
| Model | Parameters |
|---|---|
| DeepSeek-R1-Distill | 1.5 billion |
| Llama3.2 | 1 billion |
| Qwen2.5-Coder | 1.5 billion |
| Qwen2.5-Instruct | 1.5 billion |
| Qwen2 | 1.5 billion |
The same post said larger models were being prepared for later updates. On-device docs describe the 8 GB HAT memory as suitable for LLMs and VLMs up to about six billion parameters. Treat that as the planning ceiling unless a later Hailo zoo entry and Raspberry Pi note say otherwise. Edge models in the 1B to 7B neighbourhood are the realistic expectation; they will not match a frontier cloud model on reasoning breadth, but they keep prompts and documents on hardware you control.
Pick by job. Coder variants help with short scripting tasks. Instruct and chat-oriented builds suit Q&A. Distilled reasoning models are interesting for step-by-step answers, still within the small-parameter budget. Pull one model first, confirm latency feels usable for your prompts, then add others so you do not fill storage with unused weights.
When you compare this to laptop Ollama, remember the conversion path. Hailo-ready builds are not the same files you pull with a stock ollama run on x86. Stick to names returned by the hailo-ollama list endpoint unless Hailo publishes a documented import path. That discipline avoids a long download that never loads on the NPU.
For day-to-day use, keep prompts short while you learn the latency profile. Summarising a paragraph, rewriting an email, explaining a compiler error, or asking for a bash one-liner are good first tests. Dumping an entire repository into context is how you discover the edge ceiling the hard way.
Optional: Open WebUI in Docker on Raspberry Pi OS Trixie
Terminal curl calls prove the API. A browser chat UI is nicer for daily use. Raspberry Pi documents Open WebUI as the optional front end, and they are explicit about why Docker appears: Open WebUI is incompatible with Python 3.13 on Trixie, so a container avoids fighting the system Python.
Install Docker Engine from Docker’s Debian instructions (the AI software page mirrors the same flow). In short: remove conflicting distro docker packages if present, add Docker’s apt repository for your OS codename (trixie), install docker-ce and friends, start the service, add your user to the docker group, and re-login or run newgrp docker. Confirm with docker run hello-world.
Pull Open WebUI and start it against hailo-ollama on host networking:
docker pull ghcr.io/open-webui/open-webui:main
docker run -d \
  -e OLLAMA_BASE_URL=http://127.0.0.1:8000 \
  -v open-webui:/app/backend/data \
  --name open-webui \
  --network=host \
  --restart always \
  ghcr.io/open-webui/open-webui:main
Watch startup with docker logs open-webui -f until the server reports it is ready. Then open http://127.0.0.1:8080 on the Pi (or via SSH tunnel from another machine). Create the first admin account as Open WebUI prompts, select a model you already pulled through hailo-ollama, and chat.
Two operational details save confusion. First, hailo-ollama must already be listening on port 8000; Open WebUI does not replace that backend. Second, --network=host is what lets the container reach 127.0.0.1:8000 on the Pi. If you change networking mode, you also need a different base URL that the container can route.
Open WebUI will try to talk to whatever OLLAMA_BASE_URL you set. If the chat pane shows connection errors, verify hailo-ollama is still in the foreground of its terminal and that curl --silent http://127.0.0.1:8000/hailo/v1/list still returns models. Restarting only the container will not help if the backend process exited.
Bind the UI to localhost until you add authentication and HTTPS. A LAN-wide Open WebUI with no password is a chat endpoint sitting on your home network. That is fine for a desk experiment and a poor default for a shared flat or office VLAN.
For a fuller self-hosted AI box later, pair this with habits from a home server or NAS beginners guide: backups for the Open WebUI volume, a reverse proxy with HTTPS if you expose the UI beyond localhost, and enough cooling that sustained prompts do not thermal-throttle the HAT. If the Pi is one guest among many, the same caution applies inside Proxmox VE on a home lab host; pass through PCIe carefully or keep the AI HAT on bare metal Pi OS instead of fighting nested device assignment.
Limits you should expect from a Pi-sized LLM
This stack is for private, low-latency, small-model work at the edge. It is not a drop-in replacement for a hosted frontier model. Context windows, tool use, and multilingual depth will track whatever the Hailo-optimised builds expose, which is a narrower menu than the full Ollama Hub on an x86 GPU box.
Thermals matter. Raspberry Pi documents the HAT heatsink specifically so sustained inference does not force throttling. Keep the Active Cooler on the SoC as well. Dust, a sealed case without airflow, or a starved USB-C supply will show up as flaky performance long before they show up as a clear error message.
Storage and networking still sit on the Pi. Model pulls need disk headroom. A slow SD card makes pulls painful; NVMe boot helps if you are not using the PCIe lane for the HAT. And because GenAI traffic stays local, your prompts are only as private as the rest of the Pi: SSH hardening, updates, and physical access still count.
Who this setup is for
Builders who already like Raspberry Pi 5 as a quiet always-on box get the most from AI HAT+ 2. Think private drafting assistant, local coding helper, or a camera-plus-language experiment that should not depend on an API key. Teachers and clubs that already own Pi 5 kits can demonstrate on-device GenAI without renting cloud GPUs for every workshop seat.
Skip it if you need large-context research agents, heavy multimodal studio work, or multi-user throughput that saturates a small NPU. In those cases a used GPU workstation or a rented instance remains the rational spend, and the Pi can stay on networking, home automation, or storage duty instead.
Who should consider it
AI HAT+ 2 is the first Raspberry Pi accessory that treats on-device chat as a first-class job instead of a CPU party trick. The split is honest: buy AI HAT+ for cameras and vision; buy AI HAT+ 2 when you want hailo-ollama and a small local model without shipping every prompt to a cloud API.
I would budget for the Active Cooler, the included HAT heatsink, and solid power before I worried about chasing every model in the zoo. Get identify working, pull one 1B or 1.5B instruct model, and only then add Open WebUI. Skip the HAT entirely if your workload needs 70B-class quality; rent a GPU or keep a desktop Ollama box for that, and use the Pi for the private, always-on assistant that only needs modest weights.
The $200 HAT is a specialist purchase. It makes sense if you already have a Pi 5 and need local inference for a small project. If your main goal is to try a wider range of language models, compare the total cost with a laptop or mini PC running Ollama before buying.
FAQ
Can the original AI HAT+ run local LLMs?
No. Official model comparison tables mark LLM and VLM support as AI HAT+ 2 only. AI HAT+ remains a vision accelerator that shares the Pi’s RAM.
Do I need to enable PCIe Gen 3 by hand?
Not for AI HAT+ or AI HAT+ 2. Raspberry Pi says Gen 3 is applied automatically on those boards. Manual Gen 3 configuration is called out for the AI Kit.
Why install hailo-h10-all instead of hailo-all?
Because the packages target different silicon and cannot coexist. AI Kit and AI HAT+ use hailo-all. AI HAT+ 2 uses hailo-h10-all.
Why is Open WebUI forced into Docker?
Raspberry Pi’s LLM instructions state that Open WebUI is incompatible with Python 3.13 on Raspberry Pi OS Trixie. Docker gives it a supported runtime without downgrading system Python.
What port does hailo-ollama use?
The documented examples call http://localhost:8000 for list, pull, and chat. Open WebUI is pointed at that base URL and serves its own UI on port 8080 when started with host networking as shown above.
Can I keep an M.2 NVMe HAT and the AI HAT+ 2 together?
Not on the same Pi 5 PCIe connector. Both accessories need that link. Choose one PCIe device, or move storage to SD/USB while the AI HAT owns PCIe.
Is this the same as stock Ollama on a PC?
It is API-familiar, not identical. You install Hailo’s GenAI zoo and run hailo-ollama with models compiled for Hailo-10H. Commands look Ollama-like, but the backend and model list come from Hailo’s stack as wired by Raspberry Pi’s docs.
- SourceOpen WebUI Quick Start
- SourceOpen WebUI documentation