
To set up a 3-2-1 restic backup on a Linux home server, install restic 0.19.1, keep the repository password in a root-only file, and create one encrypted repository on a separate local disk. Back up to it every night. Then create a second repository on off-site storage such as Backblaze B2 through its S3-compatible API and copy your snapshots there with restic copy. Clean up old snapshots with restic forget --prune, schedule everything with a systemd timer, and prove it works with restic check and a real test restore.
Restic is a free, open source backup program released under the BSD 2-Clause licence. It ships as a single executable for Linux, BSD, macOS and Windows. Every backup is a snapshot. Data is deduplicated, so unchanged files cost almost nothing on later runs, and everything in the repository is encrypted before it leaves the machine. That last part matters when one copy lives on someone else’s storage. If you are still choosing the hardware itself, start with our beginner’s guide to home servers and NAS boxes and come back once you have data worth protecting.
This guide is based on restic 0.19.1, the current release. The project published it on 5 July 2026 as a bug fix update to 0.19.0, which arrived on 9 June 2026. Version 0.19.0 made index loading much faster, cut memory use for check, copy, diff and stats, and let check be limited to selected snapshots. It also made prune repack small pack files more aggressively and added the fastest and better zstd compression levels.
What a 3-2-1 backup looks like with restic
The 3-2-1 rule is simple: keep three copies of your data, on two different kinds of storage, with one copy off-site. A disk failure, a bad command or ransomware can take out the server. A fire or theft can take out the whole house. Two copies in the same room only protect you from the first group.
Here is how the three copies map onto a restic setup:
| Copy | Where it lives | How it gets there | What it protects against |
|---|---|---|---|
| 1. Live data | The server’s own drives (for example /srv, /home, /etc) | It is your working data | Nothing on its own |
| 2. Local backup | A restic repository on a separate disk, such as a USB drive or a second internal disk | restic backup every night | Deleted files, bad updates, a failed system disk |
| 3. Off-site backup | A second restic repository on Backblaze B2, another S3-compatible service, an SFTP server or any rclone remote | restic copy from the local repository | Fire, theft, flooding, or losing the whole server |
A RAID array or ZFS mirror is not on this list. Redundancy keeps the server running when one drive dies, but it faithfully mirrors deletions and encryption by ransomware, too. A backup has history you can go back to.
Why copy snapshots rather than run two separate backups? Reading your files once and sending them to the off-site repository from the local copy keeps the load on the server’s disks down. It also means both repositories hold the same snapshots. Running restic backup twice, once per repository, is also fine. Pick the one you find easier to reason about.
What you need
- A Linux home server or NAS with root or sudo access. The commands below assume Debian, Ubuntu or Fedora with systemd.
- A separate disk for the local repository, mounted somewhere like
/mnt/backup. It should not be one of the disks you are backing up. - An off-site storage account. This guide uses Backblaze B2, but any S3-compatible service, an SFTP server you control, or any storage rclone supports will work.
- A password manager or other safe place outside the server for the repository passwords.
- About an hour, plus however long the first upload takes on your internet connection.
Restic’s documentation advises against keeping a repository on a CIFS (SMB) share mounted on Linux, so use a local disk, SFTP or an object storage backend for both repositories.
Step 1: Install restic
Most distributions package restic, which is the quickest route:
# Debian and Ubuntu
sudo apt-get install restic

# Fedora
sudo dnf install restic

# Arch Linux
sudo pacman -S restic
Distribution packages can lag behind. The restic docs say that if a package is outdated, you can always use an official binary from the project’s GitHub releases page instead. Each release ships with SHA256SUMS and a signed SHA256SUMS.asc file so you can check the download. Official binaries can then update themselves in place:
restic version
sudo restic self-update
The user running self-update needs permission to replace the restic binary, which is why it runs with sudo here. The command checks the GPG signature on the release files before installing. The command is meant for the official binaries. If you installed restic from your distribution, update it through the package manager instead.
Step 2: Store the passwords and settings safely
Restic encrypts every repository with a password, and the docs are blunt about it: if you lose the password, your data is irrecoverably lost. Nobody can reset it for you, including the storage provider.
For an unattended backup, put each password in a file that only root can read. Then point restic at it with the RESTIC_PASSWORD_FILE environment variable or the --password-file flag. A small environment file per repository keeps the commands short:
sudo mkdir -p /etc/restic
sudo chmod 700 /etc/restic

# Generate a long random password for each repository
openssl rand -base64 32 | sudo tee /etc/restic/local.pass >/dev/null
openssl rand -base64 32 | sudo tee /etc/restic/b2.pass >/dev/null
sudo chmod 600 /etc/restic/*.pass
Then create /etc/restic/local.env for the local repository:
RESTIC_REPOSITORY=/mnt/backup/restic-repo
RESTIC_PASSWORD_FILE=/etc/restic/local.pass
Copy both passwords into your password manager now, before you back up anything. A backup encrypted with a password that only exists on the server you are protecting is useless the day that server dies.
One repository can have several keys, and each key has its own password. restic key add creates an extra key, restic key list shows them, and restic key passwd changes the current one. That lets you keep a second, memorised password for emergencies.
Step 3: Create the local repository
With the disk mounted at /mnt/backup, load the environment file and initialise the repository:
sudo -i
set -a; . /etc/restic/local.env; set +a
restic init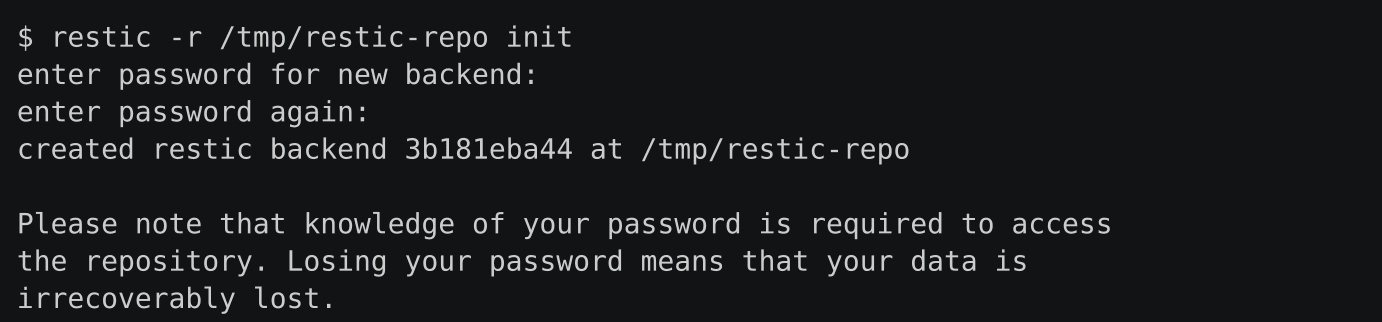
New repositories use repository format version 2, the default since restic 0.14.0. It supports compression, and restic compresses new data automatically (the default compression level is auto). Restic refuses to create a repository with an empty password unless you pass --insecure-no-password. Do not.
The sudo -i line matters. To read every file under /etc, /home and /srv, restic must run as root or have the CAP_DAC_READ_SEARCH capability. The restic docs describe a non-root systemd setup with DynamicUser=yes and that capability, if you would rather not run backups as root.
Step 4: Run your first restic backup
Decide what to back up before you decide how. On a typical home server, that means configuration (/etc), home directories and your data shares. Docker or app data directories belong on the list, too. The operating system itself is easy to reinstall, so a whole-disk backup of / is optional.
Keep excludes in a file so the scheduled job and your manual runs always match. Create /etc/restic/excludes.txt:
/home/*/.cache
/srv/downloads/incomplete
*.tmp
Then run the backup:
restic backup /etc /home /srv \
  --exclude-file=/etc/restic/excludes.txt \
  --exclude-caches \
  --one-file-system \
  --verbose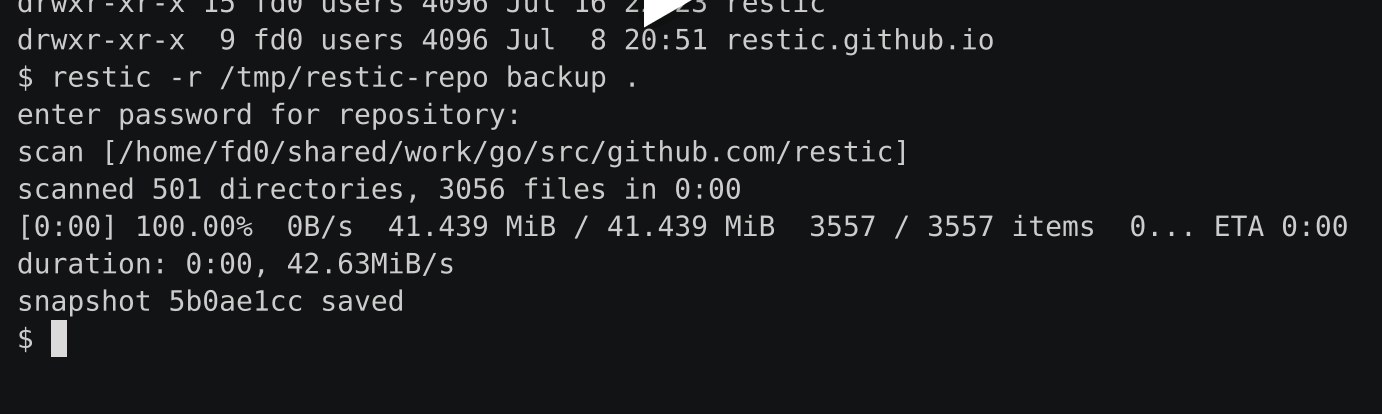
--exclude-caches skips folders with a standard CACHEDIR.TAG file. --one-file-system keeps restic from crossing into another mounted file system below each path you name. If a data disk is mounted inside /home or /srv, add that mount point to the backup command explicitly or its files will be missed. Keep the backup disk out of the paths you list. Excludes do not apply to paths you name explicitly on the command line.
The first run reads everything. Later runs are much faster. On Linux, restic decides whether a file changed by comparing its modification time, change time, size and inode number with the previous snapshot, and it only reads changed files. At the end it prints how much new data was added after deduplication and compression. List what you have with:
restic snapshotsA snapshot is only written when a backup finishes successfully. If a run is interrupted or the disk fills up, no half-finished snapshot is recorded and the earlier snapshots stay intact.
Step 5: Add the off-site copy on Backblaze B2
Backblaze B2 works with restic through two backends. Restic’s own documentation recommends the S3-compatible API over its native B2 backend because the B2 library has known error handling problems, so that is what this guide uses.
- In the Backblaze web console, create a Private bucket. Note the Endpoint shown for it. Backblaze’s example looks like
s3.us-west-002.backblazeb2.com. - Under Application Keys, click Add a New Application Key. Limit it to this one bucket with Read and Write access, and tick Allow List All Bucket Names, which Backblaze says S3 tools need for a bucket-restricted key.
- Copy the keyID and applicationKey. Backblaze only shows the application key once.
- Open the bucket’s Lifecycle Settings and choose Keep only the last version of the file. The reason is explained below.
Now create /etc/restic/b2.env, swapping in your endpoint, bucket name and key:
RESTIC_REPOSITORY=s3:s3.us-west-002.backblazeb2.com/your-bucket-name
RESTIC_PASSWORD_FILE=/etc/restic/b2.pass
AWS_ACCESS_KEY_ID=your-keyID
AWS_SECRET_ACCESS_KEY=your-applicationKey
Restic uses the standard AWS_ACCESS_KEY_ID and AWS_SECRET_ACCESS_KEY variables for any S3-compatible service. Backblaze treats the key ID and application key as the equivalent of an access key ID and secret access key. Lock the file down with chmod 600.
Create the off-site repository with the same chunker parameters as the local one. Without this, deduplication between the two repositories does not work, and copied data can take up to twice the space:
set -a; . /etc/restic/b2.env; set +a
export RESTIC_FROM_REPOSITORY=/mnt/backup/restic-repo
export RESTIC_FROM_PASSWORD_FILE=/etc/restic/local.pass

restic init --from-repo "$RESTIC_FROM_REPOSITORY" --copy-chunker-params
restic copy --verbose
restic copy sends every snapshot from the local repository that is not already off-site. Because the two repositories use different encryption keys, restic reads the data and uploads it again, so the first copy is a full upload. Later runs only send new data and skip snapshots already copied. If a copy is interrupted, running it again resumes, although up to 10 minutes of progress can be lost.
Why the lifecycle setting matters
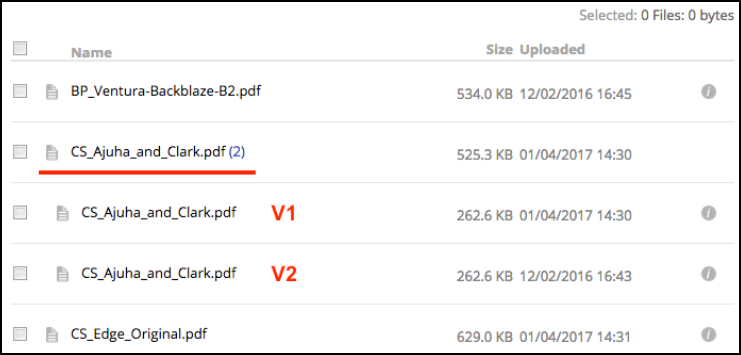
When restic uses the S3 API to delete old data during a prune, B2 does not delete the files outright. It hides them and keeps the older versions, which still use storage you pay for. The restic docs tell you to set the bucket lifecycle rule to keep only the last version. With that setting, Backblaze hides the previous version for one day and then deletes it.
Other off-site options
An SFTP server you control, perhaps a friend’s machine or a small VPS, works with sftp:user@host:/srv/restic-repo. It needs SSH key login with no password prompt. For storage that restic does not support directly, the rclone backend (rclone:remote:path) lets restic use any remote you have configured in rclone. Restic starts and stops rclone itself, and you can cap bandwidth with the RCLONE_BWLIMIT variable.
Step 6: Set a retention policy with forget –prune
Without a policy, a repository keeps every snapshot forever. restic forget removes snapshots that fall outside the rules you give it, and prune deletes the data no remaining snapshot needs. forget --prune does both in one go. Always try a policy with --dry-run first:
restic forget --keep-daily 7 --keep-weekly 5 --keep-monthly 12 --dry-runThe main options:
| Option | What it keeps |
|---|---|
--keep-last n | The n most recent snapshots |
--keep-daily n | The latest snapshot for each of the last n days that have one |
--keep-weekly n | The latest snapshot for each of the last n weeks (weeks run Monday to Sunday) |
--keep-monthly n | The latest snapshot for each of the last n months |
--keep-yearly n | The latest snapshot for each of the last n years |
--keep-within 30d | Every snapshot within that duration of the newest snapshot |
--keep-tag name | Every snapshot with that tag, whatever else the policy says |
The rules add up. A snapshot survives if any one of them keeps it. By default restic applies the policy separately to each combination of host and backup paths. So if you change the list of folders you back up, the old snapshots form their own group and are not cleaned up by the new one. Run restic snapshots after the first real prune to check the result.
Each repository needs its own forget, because copy only adds snapshots. In my view, a sensible starting point for a home server is 7 daily, 5 weekly and 12 monthly locally, with the same or a longer policy off-site. Prune locks the repository while it runs, so other restic commands on that repository have to wait.
Step 7: Automate it with a systemd timer
Restic has no built-in scheduler, so the restic docs point you to cron or systemd. A systemd timer is the better fit on a modern server because it can catch up on runs missed while the machine was off. First, a script at /usr/local/bin/restic-backup.sh that does the whole nightly job:
#!/bin/bash
set -uo pipefail

EXCLUDES=/etc/restic/excludes.txt
KEEP="--keep-daily 7 --keep-weekly 5 --keep-monthly 12"

# 1. Local backup
set -a; . /etc/restic/local.env; set +a
restic backup /etc /home /srv --exclude-file="$EXCLUDES" \
  --exclude-caches --one-file-system
rc=$?
# Exit code 3: some files could not be read, but a snapshot was still saved
if [ "$rc" -ne 0 ] && [ "$rc" -ne 3 ]; then exit "$rc"; fi
restic forget $KEEP --prune || exit $?

# 2. Off-site copy
set -a; . /etc/restic/b2.env; set +a
export RESTIC_FROM_REPOSITORY=/mnt/backup/restic-repo
export RESTIC_FROM_PASSWORD_FILE=/etc/restic/local.pass
restic copy || exit $?
restic forget $KEEP --prune || exit $?

exit "$rc"
Make it executable with sudo chmod 700 /usr/local/bin/restic-backup.sh. Then create the service unit at /etc/systemd/system/restic-backup.service:
[Unit]
Description=Restic backup (local repository plus off-site copy)
Wants=network-online.target
After=network-online.target
RequiresMountsFor=/mnt/backup

[Service]
Type=oneshot
ExecStart=/usr/local/bin/restic-backup.sh
Nice=10
IOSchedulingClass=idle
And the timer at /etc/systemd/system/restic-backup.timer:
[Unit]
Description=Run the restic backup every night

[Timer]
OnCalendar=*-*-* 02:30:00
RandomizedDelaySec=15min
Persistent=true

[Install]
WantedBy=timers.target
OnCalendar= takes a calendar expression, so *-*-* 02:30:00 means every day at 02:30. With Persistent=true, systemd records when the job last ran and starts it straight away after boot if a run was missed while the server was off. RandomizedDelaySec= adds a random delay of up to 15 minutes. The timer starts the service with the same name automatically. Enable it and run one job by hand to make sure it works:
sudo systemctl daemon-reload
sudo systemctl enable --now restic-backup.timer
sudo systemctl start restic-backup.service
journalctl -u restic-backup.service -n 50
systemctl list-timers restic-backup.timer
If a backup is still running when the timer fires again, systemd leaves it running and does not start a second instance. That covers the restic docs’ advice to guard against overlapping runs. If the job fails, systemctl status restic-backup.service shows it as failed. Hooking that up to an email or push alert, for example with an OnFailure= unit, is worth the extra ten minutes.
Step 8: Verify with restic check and a test restore
A backup you have never restored from is a hope, not a backup. Restic gives you two kinds of verification, and you want both.
restic check verifies the structure of the repository and that all the data it references exists. Adding --read-data also downloads and verifies every pack file, which is thorough but slow and, off-site, costs bandwidth. A random subset each week is a good middle ground:
# Local repository: read everything once a month
restic check --read-data

# Off-site repository: read a random 5% each run
restic check --read-data-subset=5%
--read-data-subset also accepts a fixed share such as 1/5 (run 2/5 next time, and so on, to cover the whole repository) or a size such as 10G. The restic docs also recommend running check after a prune. If it reports errors, follow the repair steps in restic’s troubleshooting guide rather than pruning again.
Then restore something for real, into a scratch folder rather than over your live data:
# Preview what would be restored
restic restore latest --target /tmp/restore-test --include /etc/fstab --dry-run --verbose=2

# Restore one folder from the latest snapshot
restic restore latest:/home/alice/Documents --target /tmp/restore-test

# Browse all snapshots as a file system (needs FUSE)
mkdir -p /mnt/restic
restic mount /mnt/restic
Compare the restored files with the originals, then delete the test folder. Do the same test against the off-site repository at least once by loading b2.env first, ideally from a different machine with nothing but your password manager. That is the scenario 3-2-1 exists for. For big restores, restic restore is much faster than copying out of a restic mount.
Restic vs BorgBackup
BorgBackup is the other popular choice for Linux servers, and it is a good one. The current stable release is Borg 1.4.5, out on 18 July 2026, while Borg 2.0 is still in beta. The differences come down to where you want the backups to live:
| Restic 0.19 | BorgBackup 1.4 | |
|---|---|---|
| Encryption | Always on: AES-256 in counter mode with a Poly1305-AES MAC | Chosen at borg init. repokey with a strong passphrase is the recommended default, and none is possible but discouraged |
| Remote storage | Local, SFTP, REST server, S3-compatible, B2, Azure, Google Cloud Storage, Swift and anything rclone supports | Local paths, or SSH to a server running Borg. Cloud object storage needs a separate sync tool |
| Off-site copy of a repository | restic copy between repositories | Copy the repository directory with a tool such as rsync or rclone |
| Freeing space | forget --prune | borg prune, then borg compact |
| Compression | zstd on repository version 2, level auto by default, with fastest and better levels added in 0.19.0 | lz4 by default, plus zstd, zlib, lzma or none |
| Platforms | Single binary for Linux, BSD, macOS and Windows | Linux, BSD and macOS. Windows only via WSL or Cygwin, both marked experimental |
My take: if your off-site copy is going to a cloud bucket, restic is the simpler choice because it talks to object storage directly. If you already have a second Linux box or a hosting service that runs Borg over SSH, Borg is just as solid, and you can lock clients down with borg serve --restrict-to-path.
Troubleshooting
The job failed: what does the exit code mean?
Restic returns documented exit codes, so scripts can tell what went wrong. The restic docs say to treat any code not on this list as a failure:
- 0: success.
- 1: the command failed. For a backup, do not expect a snapshot to have been created.
- 3: some source files could not be read. Restic still saved a snapshot, minus those files. Check the log for which ones. For
forget, it means one or more snapshots could not be removed. - 10: the repository does not exist (restic 0.17.0 and later). Usually a wrong path, or the backup disk is not mounted.
- 11: restic could not lock the repository (0.17.0 and later).
- 12: wrong password (0.17.1 and later).
- 130: the run was cancelled, for example with Ctrl+C.
The repository is locked
Backups and prunes can be interrupted at any point without damaging the repository, but they can leave a lock behind. Restic treats locks older than 30 minutes as stale, and a lock from a process on the same machine that is no longer running as stale. If you are sure nothing else is using the repository, run restic unlock. For scripts that may overlap with a manual command, --retry-lock 10m makes restic wait for the lock instead of failing.
The backup disk is full
Prune writes repacked data before it deletes the old files, so it needs some free space. The restic docs suggest restic prune --max-repack-size 0 to use as little scratch space as possible. After that, tighten your retention policy or add exclusions for data you do not need, such as downloads and caches.
B2 storage keeps growing after prune
That is almost always the bucket lifecycle setting. Without Keep only the last version of the file, B2 keeps hidden old versions of every deleted file. Set it, and the space is reclaimed over the following days.
FAQ
Is restic free?
Yes. Restic is open source under the BSD 2-Clause licence and costs nothing. Your only costs are disks and whatever your off-site storage provider charges.
Can I back up a Windows PC or a Mac to the same repository?
Yes. Restic runs on Windows and macOS too, and several machines can back up into one repository, which also improves deduplication. On Windows, install it with winget install --exact --id restic.restic --scope Machine. Note that --one-file-system is not supported on Windows. For Macs, Time Machine is still the easiest local option, as our Time Machine backup guide explains. Restic can then handle the off-site part.
Does the cloud provider see my files?
No. Restic encrypts data on your machine before it is uploaded. According to its design documentation, everything in the repository is encrypted and authenticated, except some informational metadata in the key files. Without the password, the file contents and file metadata cannot be read. The provider sees a bucket full of opaque files.
What about my phone?
Restic is built for computers and servers, not phones. For phone data, see our guide to backing up your phone properly. If your phone backups end up on the home server, the restic job protects them too.
Should I back up databases by copying their files?
Copying the files of a running database can produce an inconsistent copy. Dump the database to a file first, for example with your database’s own dump tool, in the backup script before restic backup. Or stop the app briefly. Restic can also read a dump from standard input with --stdin-from-command.
Final word
The commands take an afternoon. The discipline is what makes this a backup. The password lives outside the server. The timer runs every night and tells you when it fails. Prune keeps both repositories a sensible size. And every few months you restore real files from the off-site copy and confirm they open. Do that, and a dead disk, a bad update or a burgled flat becomes an inconvenience instead of a loss.
- Sourcerestic.net
- Sourcerestic docs: Backing up
- Sourcerestic docs: Encryption
- Sourcerestic docs: Scripting
- Sourcerestic docs: Examples
- Sourcerestic docs: References
- Sourcesystemd.timer manual
- Sourcesystemd.time manual
- SourceBorg docs: Quick start
- SourceBorg docs: borg init
- SourceBorg docs: FAQ