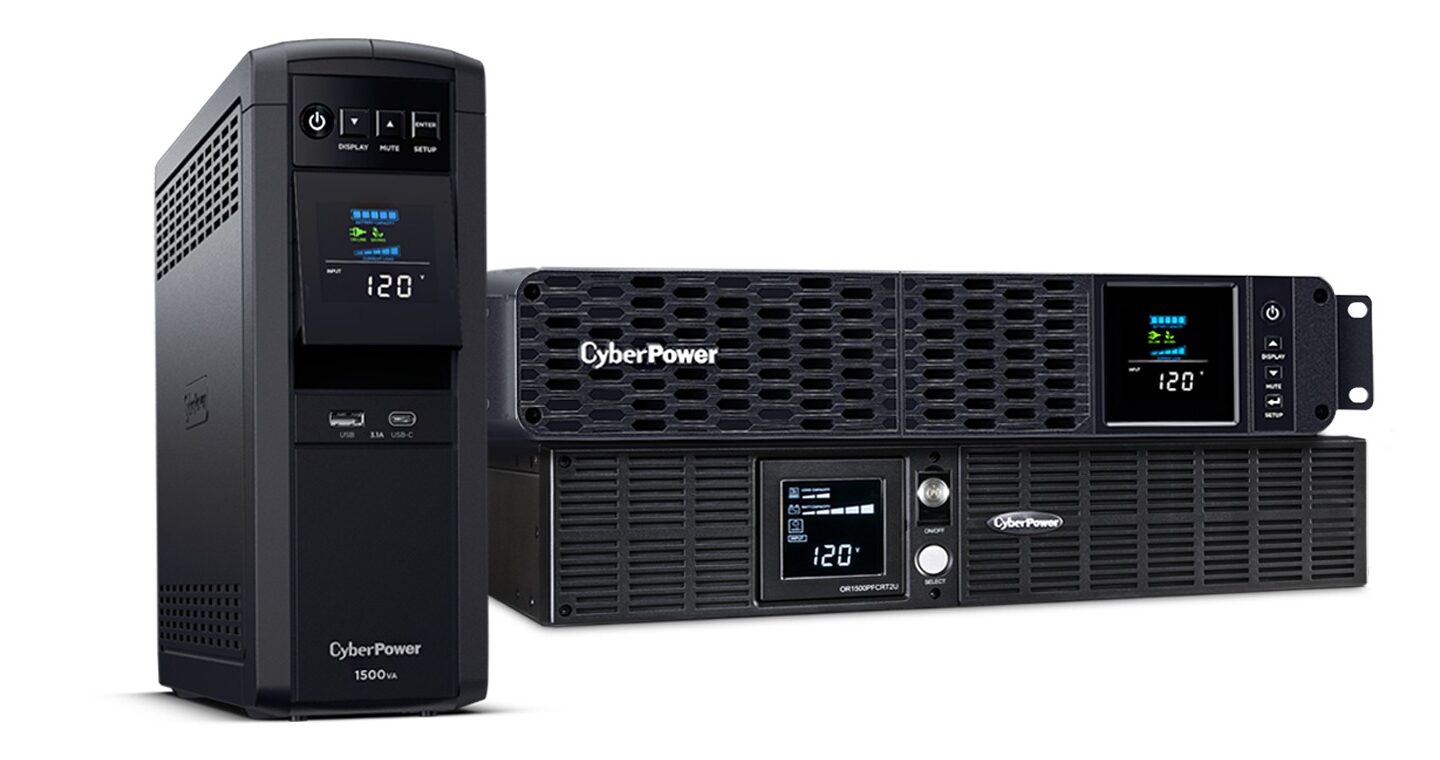
A UPS on its own only buys time. When the mains fails, your home server keeps running on battery, and when that battery runs flat it dies exactly as if someone had pulled the plug: ZFS pools, databases and VMs all lose power mid-write. In places where power cuts are routine, that can happen often, and the software fix costs nothing. Network UPS Tools (NUT) is the free, open-source software that reads your UPS over USB and shuts your server down cleanly before the battery gives out.
NUT also shares that one USB connection over your network, so other Linux machines and a compatible NAS can shut down in sequence from a single UPS. The current upstream release is NUT 2.8.5 (April 2026, per its GitHub releases); Debian 13 and Proxmox VE 9 ship 2.8.1, which covers everything a home setup needs.
If you already run SMART monitoring on your drives, the Unsafe Shutdowns counter on NVMe SSDs tells you how often this has already happened. Every number there is a power cut your server did not see coming.
How Network UPS Tools works
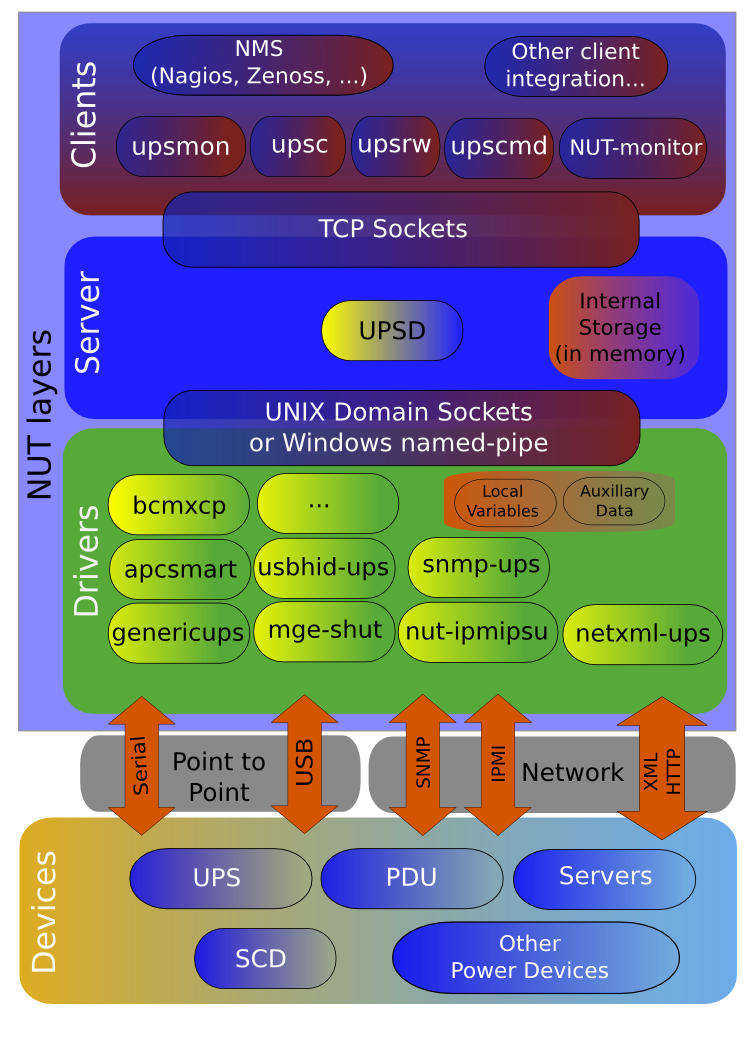
NUT is split into three layers, and knowing which piece runs where makes every config file below easier to follow:
- Driver: talks to the UPS hardware over USB, serial or the network. Many consumer UPSes with a USB data port use the
usbhid-upsdriver. - upsd (the data server): collects what the driver reads and serves it to clients over TCP port 3493.
- upsmon (the monitor): watches the UPS status through upsd and runs the shutdown. Each machine fed by the UPS runs its own upsmon.
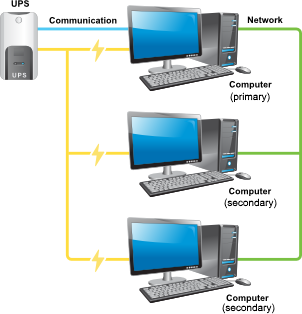
One machine has the USB cable. It runs the driver, upsd and upsmon in primary mode. Every other machine on the same UPS runs only upsmon in secondary mode and connects to the primary over the network. Older guides and some NAS interfaces still say master and slave; NUT 2.8.0 renamed them to primary and secondary, and the old keywords still work for backwards compatibility.
| Machine | Example | What it runs | NUT mode |
|---|---|---|---|
| Has the UPS USB cable and is powered by it | Proxmox VE host or Debian server | Driver, upsd, upsmon (primary) | netserver |
| Powered by the UPS, no data cable | Second server, Raspberry Pi, Linux desktop | upsmon (secondary) | netclient |
| NAS powered by the UPS | TrueNAS | Built-in UPS client set to network or slave mode | Configured in the NAS web interface |
| Single machine, nothing else on the UPS | One home server | Driver, upsd, upsmon (primary) | standalone |
Before you start: the UPS, the cable and the right machine
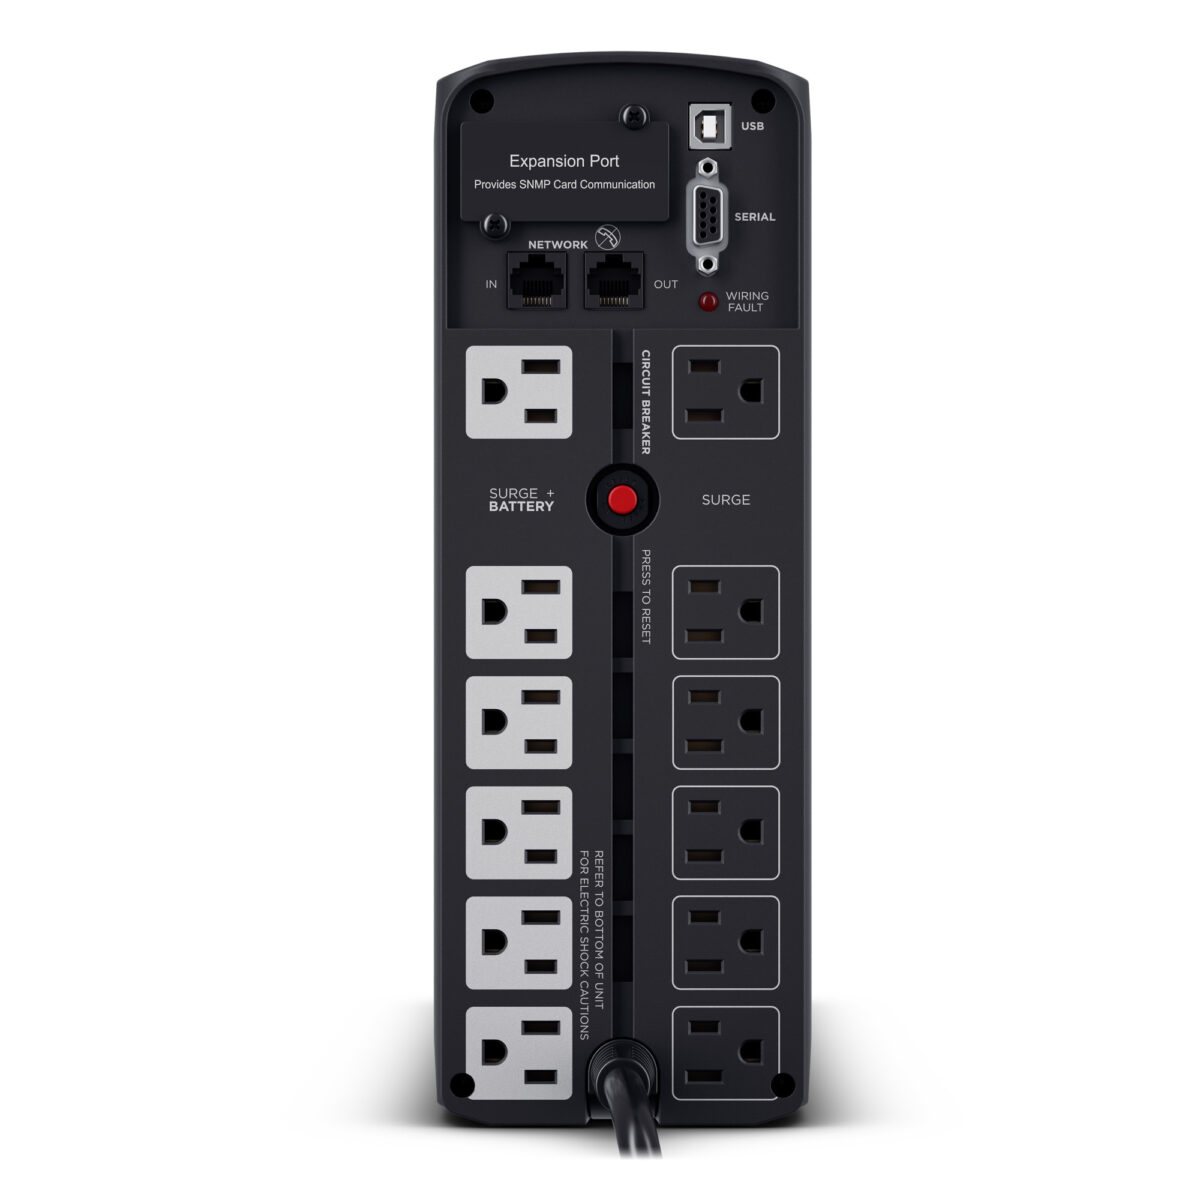
NUT needs a UPS that reports its status over a data port. A unit with a USB port that shows up as a HID power device is the easiest case, and NUT’s hardware compatibility list covers more than 170 manufacturers, including Eaton, APC, CyberPower and many budget brands. Look up your exact model in the NUT hardware compatibility list before you buy; some APC Back-UPS ranges are marked as possibly needing driver tweaks on newer units.
A few decisions matter more than the software:
- Plug the USB cable into the machine that should shut down last. On a typical home lab that is the Proxmox VE or Debian server that is always on, because it also has to stay up long enough to tell everything else to stop.
- Run NUT on the host, not inside a VM or container. The host is what has to shut down cleanly, and a VM with a passed-through USB UPS disappears the moment its host starts stopping guests.
- Put your network on the UPS. The NUT documentation says it plainly: the switch and router must be powered by the UPS too, or the secondaries cannot hear the shutdown signal once the power goes.
- Set your BIOS to power on after AC loss. NUT can tell the UPS to cut and restore power so everything reboots when mains returns, but each machine still has to be set to start on its own.
If you are still choosing hardware for the server itself, the home server or NAS guide covers the basics, and a UPS sized for your real power draw belongs on that shopping list.
Step 1: Install NUT and find your UPS
Connect the UPS USB cable to the server, then install NUT. On Proxmox VE run these as root in the host shell; on Debian or Ubuntu prefix them with sudo. The nut package pulls in both the server and the client parts.
apt update
apt install nut
nut-scanner -U
nut-scanner -U lists every NUT-compatible USB device it finds and prints it as a ready-made ups.conf section, with the driver name and the vendor and product IDs. If nothing appears, check lsusb for the UPS, try a different USB port and look up the model in the compatibility list for the right driver.
Step 2: Configure the driver and the NUT mode
All configuration lives in /etc/nut/ on Debian and Proxmox VE. Start with nut.conf, which tells the packaged services what to start. A server that shares the UPS with other machines uses netserver; a single machine with nothing else on the UPS can use standalone.
# /etc/nut/nut.conf
MODE=netserver
Next, define the UPS in ups.conf. The name in brackets is how every client will refer to it. Naming it ups keeps things simple.
# /etc/nut/ups.conf
[ups]
    driver = usbhid-ups
    port = auto
    desc = "Home lab UPS"
USB drivers ignore the port value, but it must be present, and auto is the usual choice. If you have more than one USB UPS, copy the vendor, product or serial lines from the nut-scanner output into each section so the driver matches the right unit. Then let the packaged services pick up the new device and read it back:
systemctl restart nut-driver-enumerator.service
systemctl restart nut-server.service
upsc ups@localhost
Since NUT 2.8.0, each UPS gets its own nut-driver@ systemd instance, and the enumerator service keeps those instances in sync with ups.conf. upsc should print a list of values. The ones to note now are ups.status (OL means on line power, OB on battery, LB low battery, often with CHRG while charging), battery.charge, battery.charge.low, battery.runtime in seconds, and driver.name. If upsc says the data is stale or the driver is not connected, fix that before going further; nothing else works without it.
Step 3: Let other machines reach upsd
By default upsd listens only on localhost. To serve secondaries, add a LISTEN line for the server’s LAN address in upsd.conf, keeping localhost for the local monitor:
# /etc/nut/upsd.conf
LISTEN 127.0.0.1 3493
LISTEN 192.168.1.10 3493
Replace 192.168.1.10 with your server’s fixed LAN IP. NUT’s security notes warn not to rely on LISTEN alone, so if the host firewall is enabled, allow TCP 3493 only from the machines that need it. upsd reads LISTEN only at startup, so restart it rather than reloading after any change.
Step 4: Create NUT users in upsd.users
NUT users have nothing to do with Linux accounts. They exist only in upsd.users, and each one gets a role. Create one for the local primary monitor, one shared by your secondaries and, optionally, an admin user for running UPS tests:
# /etc/nut/upsd.users
[upsmon-local]
    password = ChangeThisLocalPassword
    upsmon primary

[upsmon-remote]
    password = ChangeThisRemotePassword
    upsmon secondary

[admin]
    password = ChangeThisAdminPassword
    actions = SET
    instcmds = ALL
The upsmon primary role may request a forced shutdown; upsmon secondary can only follow one. Use plain letters and digits in passwords, because # starts a comment and spaces split values in NUT config files. These files hold passwords, so keep them readable only by root and the nut group, as the NUT manual recommends:
chown root:nut /etc/nut/upsd.conf /etc/nut/upsd.users /etc/nut/upsmon.conf
chmod 0640 /etc/nut/upsd.conf /etc/nut/upsd.users /etc/nut/upsmon.conf
systemctl restart nut-server.service
Step 5: Configure upsmon on the server as primary
Now tell the server’s own upsmon what to watch and how to shut down. Edit upsmon.conf and set these lines; most of them already exist in Debian’s commented sample file:
# /etc/nut/upsmon.conf (primary server)
MONITOR ups@localhost 1 upsmon-local ChangeThisLocalPassword primary
MINSUPPLIES 1
SHUTDOWNCMD "/sbin/shutdown -h +0"
POWERDOWNFLAG /etc/killpower
POLLFREQ 5
DEADTIME 15
HOSTSYNC 15
FINALDELAY 5
The 1 after the UPS name is the power value: how many of this machine’s power supplies the UPS feeds. Leave it at 1 unless you have a server with redundant supplies on different UPSes. POWERDOWNFLAG is the file upsmon creates when the UPS itself should be switched off at the end of the shutdown; Debian’s package includes a systemd shutdown hook that checks for it and sends that final power-off command. Start the monitor and check the log:
systemctl enable --now nut-monitor.service
journalctl -u nut-monitor.service -b
upsc -c ups@localhost
Look for a successful startup and a login to the UPS in the log. upsc -c lists the clients connected to upsd, so it is a quick way to confirm which machines are listening once you add secondaries.
Step 6: Add other Linux machines as secondaries
Every other Linux machine powered by the same UPS needs only the client package. On a Debian, Ubuntu or Raspberry Pi OS machine, including a second Proxmox VE node:
apt install nut-client
upsc ups@192.168.1.10
If upsc returns the UPS data from the server, the network side works. Set the client mode and its monitor line:
# /etc/nut/nut.conf
MODE=netclient

# /etc/nut/upsmon.conf (secondary)
MONITOR ups@192.168.1.10 1 upsmon-remote ChangeThisRemotePassword secondary
SHUTDOWNCMD "/sbin/shutdown -h +0"
Apply the same root:nut and 0640 permissions to the secondary’s upsmon.conf, then run systemctl enable --now nut-monitor.service. Back on the server, upsc -c ups@localhost should now list the secondary’s IP.
For Windows PCs, the NUT project has published Windows builds again since 2.8.1, and it lists WinNUT as a client-side port for Windows. Either can act as a secondary using the same server address, user and password.
Step 7: Connect a TrueNAS NAS to the NUT server
TrueNAS has a built-in UPS service based on NUT. A NAS on the same UPS can follow the server over the network without its own USB cable. This guide covers TrueNAS as a NUT client; verify any other NAS against its own documentation before depending on network shutdown.
TrueNAS
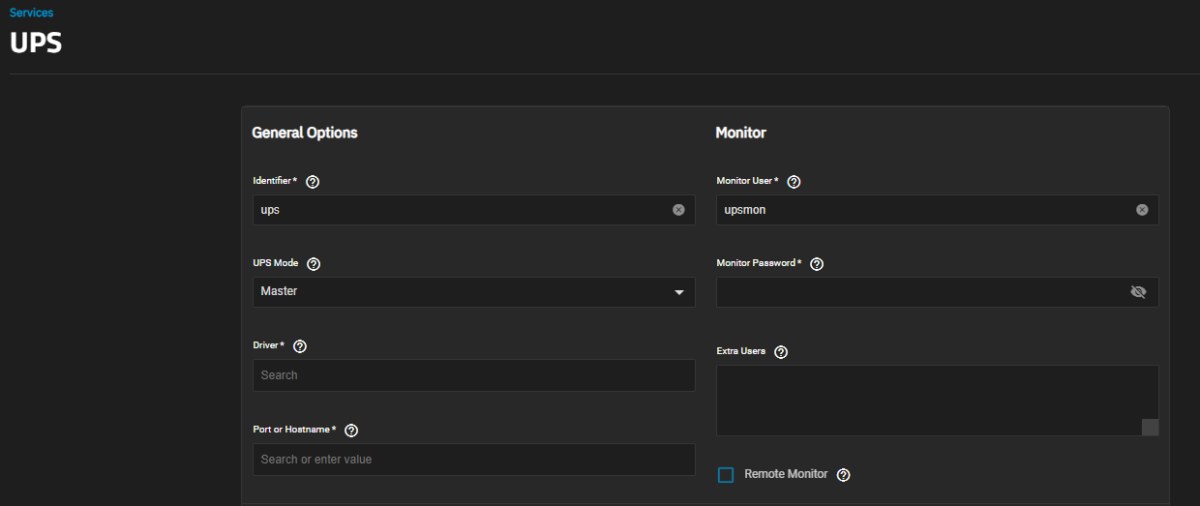
In TrueNAS 25.10, open System > Services, edit UPS and set:
- UPS Mode: Slave. TrueNAS still uses the old name; it means secondary.
- Identifier: the UPS name from your server,
upsin these examples. - Remote Host and Remote Port: your server’s IP and 3493.
- Monitor User and Monitor Password: the secondary user from Step 4. TrueNAS does not allow spaces or
#in this password. - Shutdown Mode: UPS reaches low battery to follow the server, or UPS goes on battery with a Shutdown Timer to shut the NAS down earlier.
Save, start the UPS service and turn on Start Automatically. If the TrueNAS box is the one with the USB cable instead, choose Master, pick the driver and port, and enable Remote Monitor so other machines can connect. TrueNAS documents that this option uses the well-known user upsmon with the password fixmepass, so restrict port 3493 to your LAN.
Step 8: Get the shutdown order and timing right
When the battery runs low, NUT follows a fixed sequence. The UPS reports on battery and then low battery (OB LB). The primary sets the forced shutdown flag (FSD). Each secondary sees it, waits FINALDELAY seconds, runs its SHUTDOWNCMD and logs off. The primary waits up to HOSTSYNC seconds for those logoffs, then shuts itself down, and the final shutdown hook tells the UPS to cut the load. When mains returns, the UPS switches back on and everything boots.
Everything in that chain has to fit inside the battery time left when the UPS declares low battery, and the UPS’s own threshold was not chosen with your shutdown in mind. A server that has to stop a dozen VMs needs far more time than a single desktop. These are the settings that control it:
| Setting | Where | Default | What it controls |
|---|---|---|---|
battery.charge.low and battery.runtime.low | Reported by the UPS; override in ups.conf | Depends on the UPS | When low battery is declared and the shutdown starts |
HOSTSYNC | upsmon.conf on the primary | 15 seconds | How long the primary waits for secondaries to log off |
FINALDELAY | upsmon.conf on every machine | 5 seconds | Gap between the shutdown notice and SHUTDOWNCMD |
DEADTIME | upsmon.conf | 15 seconds | How long a UPS can stop answering before it counts as dead |
offdelay and ondelay | ups.conf (usbhid-ups) | 20 and 30 seconds (60 and 120 on CyberPower) | Delay before the UPS cuts the load, and before it switches back on |
| Shutdown timeout | Proxmox VE guest Options | 180 seconds | How long Proxmox VE waits for each guest before forcing it off |
DEADTIME matters more than it looks. If a UPS that was last seen on battery stops answering for that long, upsmon assumes low battery and shuts down, because the alternative is crashing when the power runs out.
To start the shutdown earlier, the ups.conf manual describes telling the driver to ignore the UPS’s own low battery flag and use your thresholds instead. This only works if the UPS reports charge or runtime reliably, and the manual says to use it with caution:
# /etc/nut/ups.conf
[ups]
    driver = usbhid-ups
    port = auto
    ignorelb
    override.battery.charge.low = 40
    override.battery.runtime.low = 600
With these example values, the shutdown starts when charge drops below 40 percent or estimated runtime below 10 minutes, whichever comes first. Pick numbers that cover your slowest shutdown with a margin: time a normal shutdown of the server with its guests running, then add the secondaries.
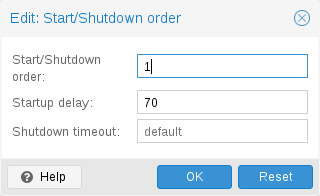
On Proxmox VE, guests are stopped in the reverse of their start order during a host shutdown, so the order you set for boot is also your shutdown plan. Set it in each VM’s or container’s Options > Start/Shutdown order. A firewall or DNS VM with order 1 starts first and stops last. If you use a long per-guest shutdown timeout, a Proxmox VE host is best kept as the primary rather than a secondary, since the primary’s own shutdown does not need to fit inside another machine’s HOSTSYNC window. A slow secondary can instead be given a longer HOSTSYNC on the primary.
Step 9: Test it safely
A shutdown setup that has never been tested is a guess. Work through these in order, from harmless to disruptive, ideally on a weekend when an unexpected reboot does not matter.
- Read the status:
upsc ups@localhoston the server andupsc ups@192.168.1.10on each secondary. If a secondary cannot read it, it cannot shut down either. - Check the UPS commands:
upscmd -l upslists the instant commands your UPS supports, such as a front panel beep test or a quick battery test. - Dry-run the power-off:
upsdrvctl -t shutdownprints the UPS power-off sequence without calling the drivers. - Pull the plug for a minute: unplug the UPS from the wall and watch
upscswitch fromOLtoOB, and check that notifications fire. Plug it back in well before the battery is low.
upscmd -l ups
upscmd -u admin ups test.panel.start
upsdrvctl -t shutdown
Run test.panel.start only if upscmd -l lists it. NUT’s documentation warns that a battery runtime test on a worn-out battery can switch the load off abruptly, so avoid deep battery tests on an old unit.
The final test is a real forced shutdown with upsmon -c fsd on the primary. It runs the full sequence: every secondary shuts down, then the primary, and then the UPS cuts and restores power, so every machine on the UPS will lose power and reboot. Save your work everywhere first. NUT also cannot cancel it: by design, the FSD flag stays set until upsd restarts. If your UPS just sits there and never cuts the load, the NUT manual calls that a power race risk and suggests a reboot after a timeout at the very least. Debian’s shutdown hook supports this through the POWEROFF_WAIT option in nut.conf: the system waits that long for the UPS to cut power, then reboots.
upsmon -c fsdStep 10: Get power cut alerts on your phone
upsmon already writes events to the system log and broadcasts them to logged-in users. To push them to your phone, have upsmon hand events to upssched, NUT’s timer helper, which calls a script of your choice. Using a timer means a two-second flicker does not wake you up, but a real outage does. On the primary, add to upsmon.conf:
# /etc/nut/upsmon.conf (primary)
NOTIFYCMD /usr/sbin/upssched
NOTIFYFLAG ONLINE SYSLOG+WALL+EXEC
NOTIFYFLAG ONBATT SYSLOG+WALL+EXEC
NOTIFYFLAG LOWBATT SYSLOG+WALL+EXEC
NOTIFYFLAG FSD SYSLOG+WALL+EXEC
NOTIFYFLAG COMMBAD SYSLOG+EXEC
NOTIFYFLAG COMMOK SYSLOG+EXEC
NOTIFYFLAG REPLBATT SYSLOG+EXEC
Then set up upssched.conf. CMDSCRIPT must come before any AT line, and Debian keeps NUT’s runtime files in /run/nut, which suits the pipe and lock files:
# /etc/nut/upssched.conf
CMDSCRIPT /usr/local/bin/ups-ntfy
PIPEFN /run/nut/upssched.pipe
LOCKFN /run/nut/upssched.lock

AT ONBATT * START-TIMER onbatt 30
AT ONLINE * CANCEL-TIMER onbatt online
AT LOWBATT * EXECUTE lowbatt
AT FSD * EXECUTE fsd
AT COMMBAD * START-TIMER commbad 60
AT COMMOK * CANCEL-TIMER commbad commok
AT REPLBATT * EXECUTE replbatt
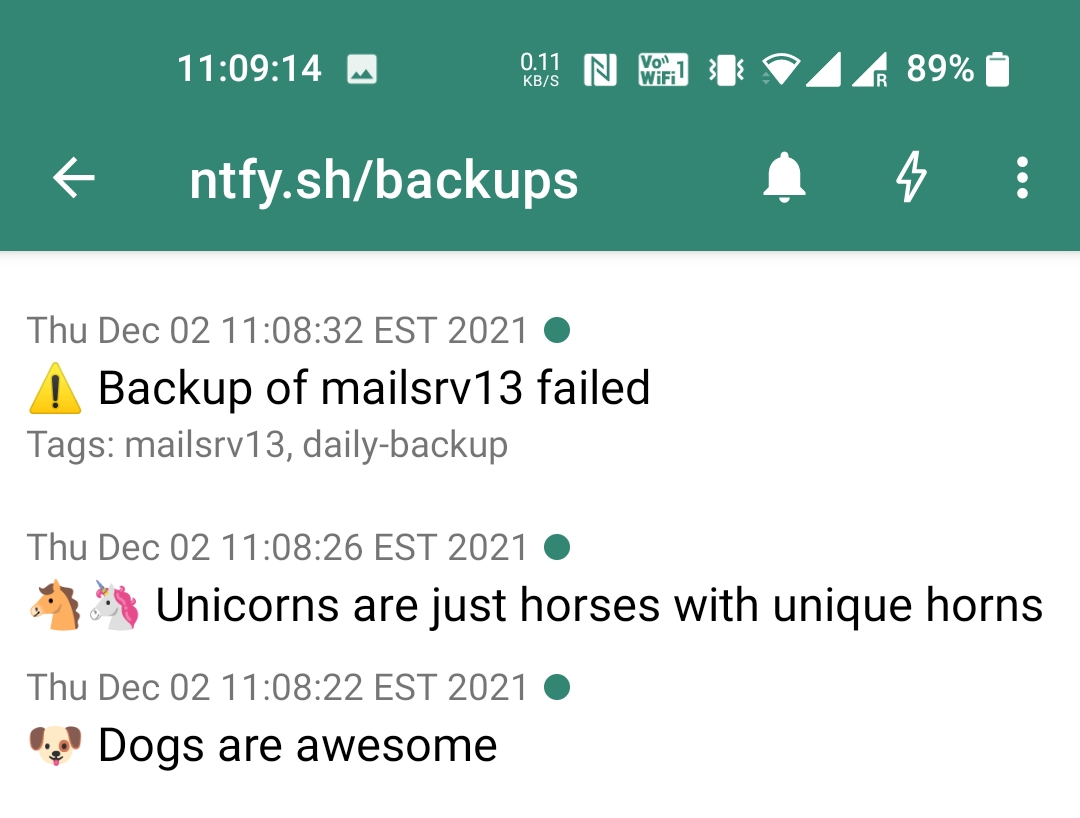
The onbatt timer only fires after 30 seconds on battery. If power returns before that, the timer is cancelled silently; if it returns after, the optional online argument tells the script to send an all-clear. The script itself can send anything. This one posts to ntfy, a free push service with Android and iOS apps:
#!/bin/sh
# /usr/local/bin/ups-ntfy
TOPIC="https://ntfy.sh/home-ups-replace-with-a-long-random-name"

send() {
  curl -s -H "Title: $1" -H "Priority: $2" -H "Tags: $3" -d "$4" "$TOPIC" > /dev/null
}

case "$1" in
  onbatt)   send "UPS on battery" high warning "Mains power has been off for 30 seconds." ;;
  online)   send "Power restored" default heavy_check_mark "The UPS is back on mains power." ;;
  lowbatt)  send "UPS battery low" urgent rotating_light "Low battery. Servers are shutting down now." ;;
  fsd)      send "Forced shutdown" urgent rotating_light "NUT has started a forced shutdown." ;;
  commbad)  send "UPS not responding" high warning "NUT lost contact with the UPS." ;;
  commok)   send "UPS contact restored" default heavy_check_mark "NUT can read the UPS again." ;;
  replbatt) send "Replace UPS battery" high warning "The UPS reports that its battery needs replacing." ;;
  *)        logger -t ups-ntfy "Unrecognized command: $1" ;;
esac
chmod 755 /usr/local/bin/ups-ntfy
systemctl restart nut-monitor.servicentfy has no sign-up for its public server, so the topic name works like a password; make it long and random, or point the script at a self-hosted ntfy server. Subscribe to the same topic in the ntfy app, then pull the UPS plug for a minute to test. Remember that the alert only leaves the house if your router and modem are on the UPS too.
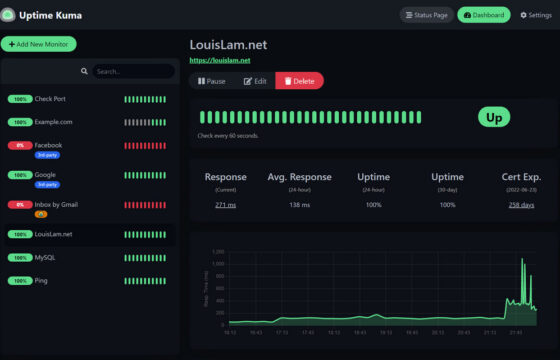
NUT cannot tell you when the server itself is down. An Uptime Kuma TCP monitor on port 3493 of your NUT server, running on another device, covers that gap.
My take
If your home server is worth backing up, it is worth a UPS and an hour of NUT setup. The software is free, mature and already built into TrueNAS, and TrueNAS has a built-in NUT client. The part people skip is the part that matters: one USB cable on the primary, network gear that stays powered, a low battery threshold that leaves enough time for VMs to stop, and a supervised shutdown test. Check the actual shutdown time on your own hardware before relying on it. If you run Proxmox VE, it makes a natural primary; the Proxmox VE install guide covers the host setup that this builds on.
FAQ
Can I run the NUT server in a Proxmox VM or LXC container?
You can pass the UPS USB device to a guest, but it is the wrong place for the primary. The host is what must shut down cleanly, and it stops its guests as part of its own shutdown, which would take a NUT server running in a guest down mid-sequence. Install NUT directly on the Proxmox VE host and treat any guests as part of the host’s shutdown.
My UPS has no USB port. Can NUT still help?
Only if it has another data interface NUT supports, such as a serial port or an SNMP network card. A UPS or home inverter with no data port gives NUT nothing to read, so it cannot trigger a clean shutdown. For a server, a UPS with a USB data port that appears in the NUT compatibility list is the simplest upgrade.
What is the difference between master and slave and primary and secondary?
Nothing in function. NUT 2.8.0 replaced master and slave with primary and secondary in upsd.users and upsmon.conf, and the old words are still accepted. TrueNAS and some guides still use the old labels.
Will my machines turn back on when the power returns?
Only if two things are set. NUT has to power-cycle the UPS at the end of the shutdown, which the POWERDOWNFLAG and Debian’s shutdown hook handle on the primary, and each machine’s BIOS or NAS settings must allow it to power on after AC loss. Without the UPS power cycle, a machine that shut down while the UPS stayed on may never see power return, which is the power race the NUT manual warns about.