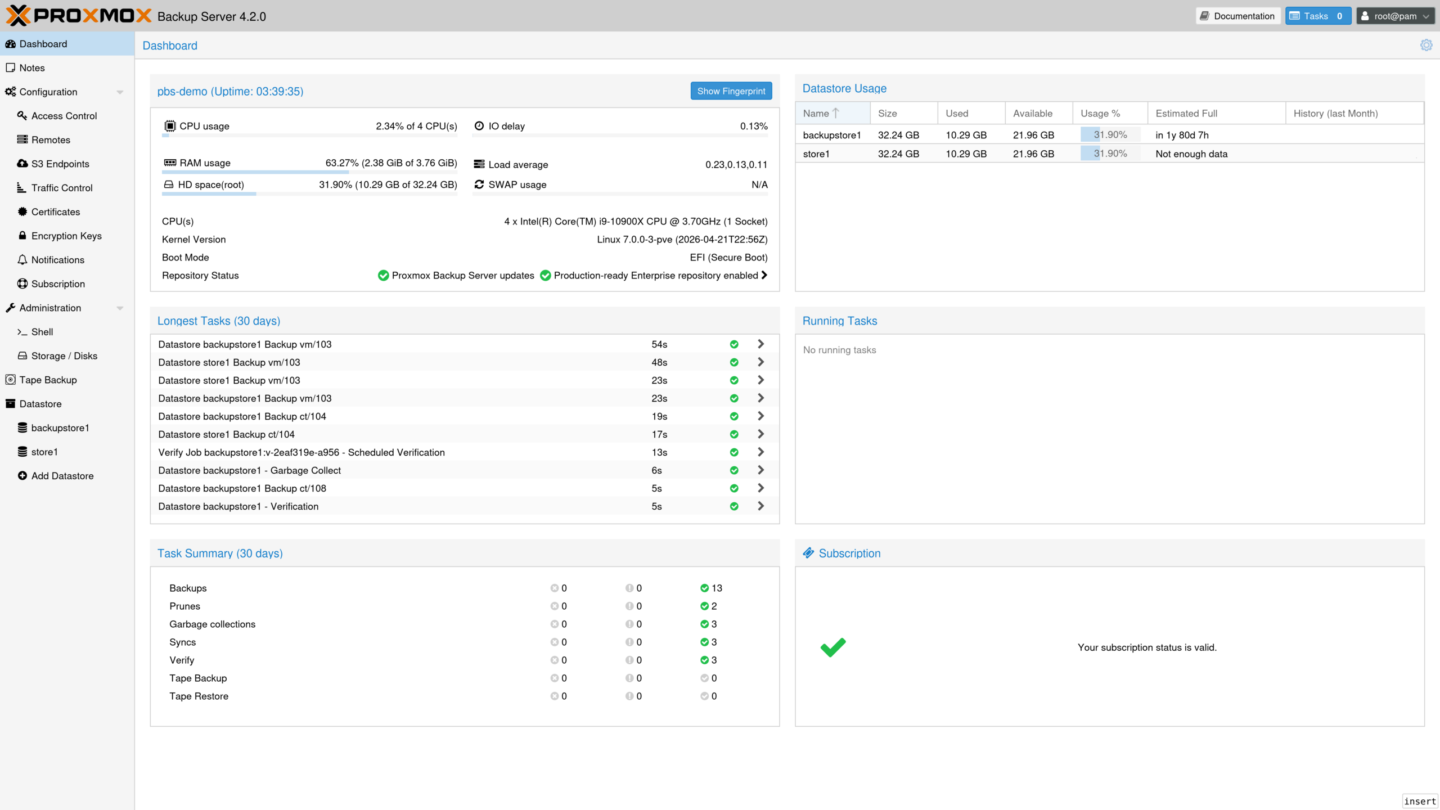
Proxmox Backup Server is the backup target Proxmox VE was built to talk to. Point your Proxmox VE host at it and every VM and container backup is sent incrementally, deduplicated on the server, checked with SHA-256 and, if you want, encrypted before it ever leaves the host. The current release is Proxmox Backup Server 4.2, released on 29 April 2026 on Debian 13.4 with a 7.0 kernel and ZFS 2.4.1, and it is free to use with the no-subscription repository.
A working home setup needs more than the installer, though. You need a datastore on the right disks, a backup user with only the permissions it needs, scheduled jobs in Proxmox VE, pruning and garbage collection so the disk does not fill up, verify jobs that catch silent corruption, and a second copy somewhere else. Each of those steps is below, with both the web interface route and the equivalent commands.
Why use Proxmox Backup Server instead of an NFS share
Proxmox VE can already back up to any directory, NFS or SMB share as plain vzdump archives. That works, but every backup is a complete new file. Proxmox Backup Server splits backups into chunks and stores each unique chunk once, so a nightly backup of a 32 GB VM that changed by a few hundred megabytes adds roughly that much new data, while each snapshot still references everything and restores as a full backup. The Proxmox VE admin guide itself recommends Proxmox Backup Server on a dedicated host over file storage because of these features.
| vzdump to NFS or a local directory | Proxmox Backup Server datastore | |
|---|---|---|
| Storage per backup | A full archive every time | Only new chunks; identical data is stored once |
| Integrity checks | None built in | SHA-256 checksums plus scheduled verify jobs |
| Encryption | None from Proxmox VE | Client-side AES-256-GCM, keys stay on the Proxmox VE host |
| Restoring single files | Extract the whole archive first | File Restore browses the backup directly |
| Starting a VM during restore | Not possible | Live-restore starts the VM while data copies in the background |
| Off-site copies | Your own scripts | Built-in pull or push sync jobs, S3 datastores, removable datastores, tape |
| Ransomware resilience | Anyone with write access can delete files | Backup-only users can add snapshots but cannot alter or delete them |
If you already keep a 3-2-1 restic backup for files and Docker data, Proxmox Backup Server does not replace it. It covers whole VMs and containers, and it slots into the same 3-2-1 thinking: the local datastore is copy two, and the off-site sync in Step 8 is copy three.
Before you start: hardware and where to run it
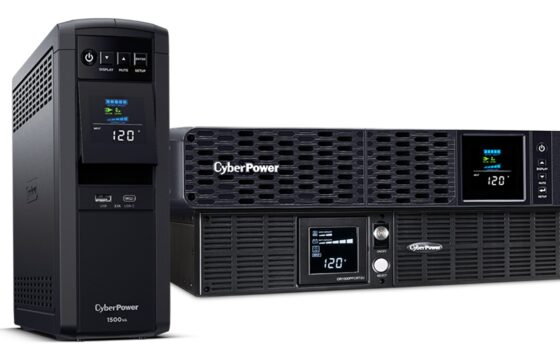
Proxmox’s own guidance is blunt about one thing: do not install the backup server on the hypervisor it protects. You can add the package to a Proxmox VE host, but the installation guide calls it not recommended, because a dead host would take its backups with it. A second small machine is the safer home layout, and an old desktop or mini PC with room for two drives is enough to start.
The documented requirements are modest for evaluation and stricter for real use:
- Evaluation minimum: a 64-bit CPU with 2 or more cores, 2 GB of RAM and more than 8 GB of disk.
- Recommended: a modern 4-core AMD or Intel CPU, at least 4 GiB of RAM for the OS, cache and daemons plus another GiB per TiB of backup storage, and 32 GiB or more for the OS on a redundant ZFS mirror or a hardware RAID with battery-backed cache.
- Backup disks: fast storage with high random IOPS. Enterprise SSDs give the best results; with hard drives, Proxmox strongly recommends a metadata cache such as a ZFS special device mirror.
That last point matters at home. Deduplicated datastores hold huge numbers of small chunk files, and verify and garbage collection jobs touch all of them. Two large hard drives in a ZFS mirror work, but jobs will be slower than on SSDs. As a rough starting point, give the datastore at least twice the space of the data you back up, so retention has room to grow.
Step 1: Install Proxmox Backup Server 4.2
Download the Proxmox Backup Server 4.2 ISO installer from the Proxmox downloads page and write it to a USB drive with a tool such as Etcher, Rufus in DD mode or dd. The process is the same as the Proxmox VE install, and the installer wipes the drives you select.
- Boot from the USB drive and pick Install Proxmox Backup Server (Graphical). If the graphical installer misbehaves, the Console option gives the same steps in a text interface with better compatibility on very old or very new hardware.
- Choose the OS disk and filesystem (ext4, xfs or ZFS). On a machine with two small SSDs for the OS, a ZFS mirror (RAID1) is the redundant choice.
- Set the country, time zone and keyboard, then the root password and an email address for system notifications.
- Set a static IP, gateway and DNS. The installer takes either IPv4 or IPv6; add the other after installation if you need dual stack.
- Check the summary, click Install, and reboot when it finishes.
Open https://YOUR-IP:8007 in a browser, accept the self-signed certificate warning and log in as root with the Linux PAM realm. Without a subscription, switch to the no-subscription repository under Administration > Repositories, or edit the file directly:
# /etc/apt/sources.list.d/proxmox.sources
Types: deb
URIs: http://download.proxmox.com/debian/pbs
Suites: trixie
Components: pbs-no-subscription
Signed-By: /usr/share/keyrings/proxmox-archive-keyring.gpg
Disable the enterprise repository (add Enabled: false to its stanza in pbs-enterprise.sources), then update. Proxmox’s FAQ warns against plain apt upgrade because it can leave a partially upgraded system; use full-upgrade:
apt update
apt full-upgrade
Already running Debian 13? You can skip the ISO, add the same repository and run apt install proxmox-backup-server, which keeps the Debian kernel. Proxmox notes that disk and network setup is then entirely your job. Proxmox Backup Server 3 reached end of life in August 2026, so any older install should be upgraded to version 4.
Step 2: Create a datastore on your backup disks
A datastore is a directory on ext4, xfs or ZFS where Proxmox Backup Server keeps chunks and snapshot indexes. In the web interface, open Administration > Storage / Disks. Initialize a blank disk with a GPT, then create either a ZFS pool (ZFS tab, for example a mirror across two disks) or a single-disk filesystem (Directory tab).
The same work from the shell, with sdX and sdY standing in for your disks:
# see which disks are unused
proxmox-backup-manager disk list

# mirrored ZFS pool on two disks, mounted at /mnt/datastore/backup
proxmox-backup-manager disk zpool create backup --devices sdX,sdY --raidlevel mirror --add-datastore true

# or: one disk with ext4 and a datastore on it
proxmox-backup-manager disk fs create backup --disk sdX --filesystem ext4 --add-datastore true
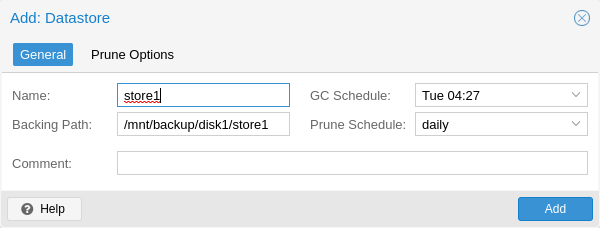
If you prepared the storage yourself, click Add Datastore at the bottom of the left sidebar. The dialog asks for a Name, a Backing Path, a GC Schedule and a Prune Schedule, plus retention under Prune Options. Leave the schedules for Step 6, where they are set up as separate jobs with clearer control.
Two filesystem limits from the documentation are worth knowing. The datastore needs a filesystem that allows at least 65,538 subdirectories in one directory, which rules out ext3 and ext4 with dir_nlink disabled. And FAT-formatted USB drives cannot hold a datastore at all, so reformat external disks to ext4 or xfs first.
Step 3: Create a backup user and API token for Proxmox VE
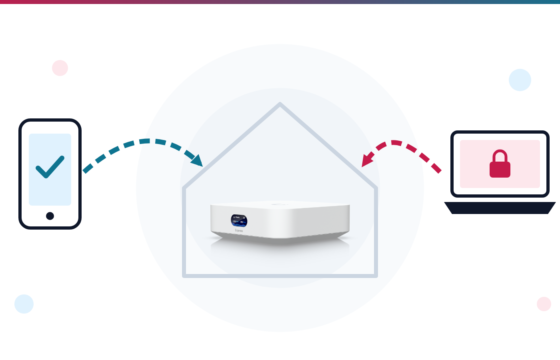
Proxmox VE could log in as root@pam, but that hands every host full control of every backup. The documentation’s ransomware advice is to give each Proxmox VE host its own API token with a single, narrow permission. The DatastoreBackup role allows creating and restoring owned backups but not deleting or changing existing ones, so a compromised hypervisor cannot wipe your history.
- Go to Configuration > Access Control > User Management and add a user such as
pve@pbsin the Proxmox Backup authentication server realm. - On the API Token tab, add a token for that user, for example
pve1. Copy the secret immediately; it is shown only once. - On the Permissions tab, add a permission for the path
/datastore/backupwith the role DatastoreBackup, once for the user and once for the token. Tokens need their own ACL entry and can never exceed their user’s rights. - Open the Dashboard and click Show Fingerprint. Proxmox VE needs this to trust the self-signed certificate.
The CLI equivalent:
proxmox-backup-manager user create pve@pbs --password 'a-long-password'
proxmox-backup-manager user generate-token pve@pbs pve1
proxmox-backup-manager acl update /datastore/backup DatastoreBackup --auth-id pve@pbs
proxmox-backup-manager acl update /datastore/backup DatastoreBackup --auth-id 'pve@pbs!pve1'
proxmox-backup-manager cert info | grep Fingerprint
There is a trade-off. A token with DatastoreBackup cannot prune, so retention must run on the backup server rather than in Proxmox VE. That is exactly what Proxmox recommends: keep delete rights off the clients and let server-side prune jobs do the cleanup.
Step 4: Add the datastore to Proxmox VE
On the Proxmox VE host, go to Datacenter > Storage > Add > Proxmox Backup Server and fill in the General tab:
- ID: a name for the storage in Proxmox VE, for example
pbs. - Server: the backup server’s IP address or DNS name. Port 8007 is the default.
- Username: the token ID,
pve@pbs!pve1. Password: the token secret. - Datastore:
backup. Fingerprint: the value from the Dashboard.
On the Backup Retention tab, tick Keep all backups, because the token cannot prune and the server will handle retention. On the Encryption tab, choose to auto-generate a client encryption key if you want backups encrypted with AES-256-GCM before they leave the host. Proxmox VE stores the key in /etc/pve/priv/storage/<STORAGE-ID>.enc.
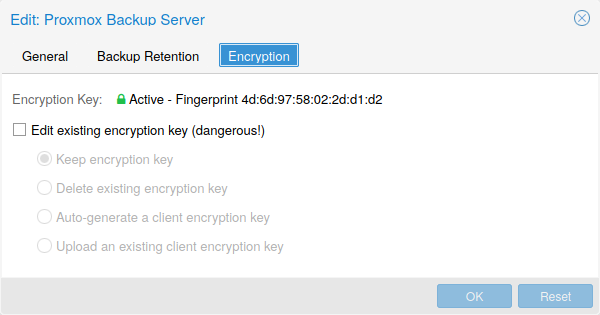
Encryption has one serious catch. The backup client documentation warns that without the key, backed up data is inaccessible, and a key that lives only on the host dies with the host. Copy the key off the host right away and store it in a password manager and on a USB drive kept somewhere safe, which is the same advice the documentation gives for master keys. For larger setups, a master public key (the master-pubkey option) adds an RSA-encrypted copy of the key to every backup for recovery.
The same storage from the Proxmox VE shell, which prompts for the token secret when --password is given without a value:
pvesm add pbs pbs --server 192.168.1.20 --datastore backup \
  --username 'pve@pbs!pve1' --password \
  --fingerprint 'AA:BB:CC:...' --prune-backups keep-all=1
pvesm status --storage pbs
Step 5: Schedule backup jobs in Proxmox VE
Backups run from Proxmox VE, not from the backup server. Go to Datacenter > Backup and click Add. On the General tab, pick the node (or all nodes), the storage you just added, a schedule such as 21:00 or mon..fri 02:00, and the guests to include with Selection mode. The Schedule field accepts free-form calendar events, and the Schedule Simulator button on the Backup panel shows when a schedule will actually fire.
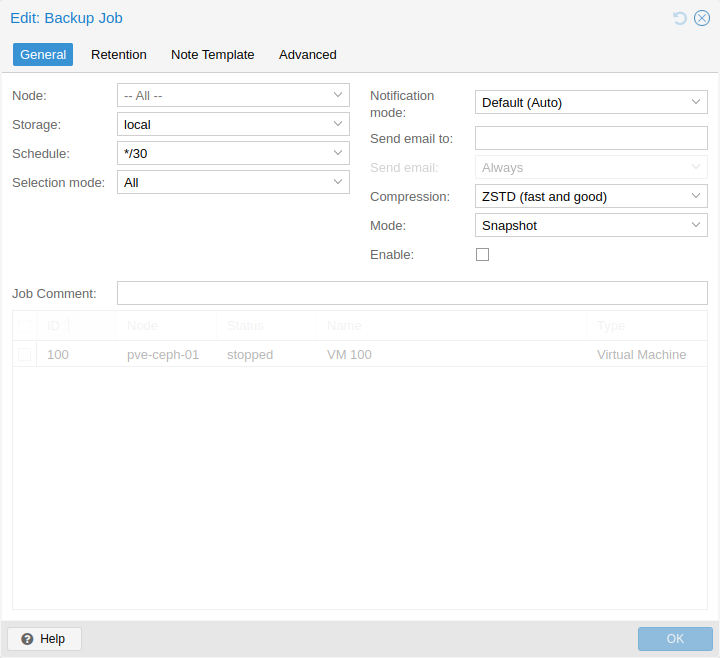
Set Mode to Snapshot. The Proxmox VE guide describes it as the lowest-downtime mode: blocks are copied while the VM keeps running, and if the QEMU guest agent is enabled and running inside the VM, Proxmox VE freezes and thaws the guest filesystems for better consistency. Containers in snapshot mode need all backed up volumes on storage that supports snapshots.
Three options on the other tabs are worth changing:
- Retention: leave it on keep all, matching the storage setting.
- Advanced > Repeat missed: runs a job as soon as possible if the host was off at the scheduled time, which suits home servers that sleep or lose power.
- Advanced > Change detection mode: for containers backed up to Proxmox Backup Server, Metadata reuses the previous snapshot’s metadata to skip reading unchanged files. VM backups are not affected by this setting.
Test the job with Run now, or back up a single guest from the shell:
vzdump 101 --storage pbs --mode snapshot
vzdump 105 --storage pbs --mode snapshot --pbs-change-detection-mode metadata
Then open the datastore’s Content tab on the backup server. Each guest appears as a backup group such as vm/101 or ct/105, with one snapshot per run.
Step 6: Set up pruning and garbage collection
Space management happens in two separate stages, and most full-disk surprises come from misunderstanding them. Pruning decides which snapshots to keep and deletes the rest, but it removes only metadata: the manifest, indexes and logs. The chunks holding the actual data stay on disk until garbage collection (GC) runs.
GC works in two phases. It first reads every index and updates the access time of each chunk still in use, then deletes chunks whose access time is older than a cutoff of 24 hours and 5 minutes before the run started (or the start of the oldest running backup). That grace period means space freed by a prune comes back on the GC run a day or more later, not straight away. Chunks still inside the window show up in the task log as Pending removals.
Create a prune job from the datastore’s Prune & GC Jobs tab. The retention options are processed in this order, and each only considers snapshots older than those already kept by the previous option:
| Option | What it keeps | Example for nightly home backups |
|---|---|---|
| keep-last | The newest N snapshots, regardless of date | 3, so a manual pre-upgrade backup never pushes out a nightly one |
| keep-hourly | The latest snapshot in each of the last N hours that had one | Not set for nightly jobs |
| keep-daily | The latest snapshot in each of the last N days | 7 to 14 |
| keep-weekly | The latest in each of the last N ISO weeks (Monday to Sunday) | 4 to 8 |
| keep-monthly | The latest in each of the last N months | 6 to 12 |
| keep-yearly | The latest in each of the last N years | 1 or 2 for a long tail |
Days, weeks or months without a backup do not count towards the numbers, so a server that was off for a week still keeps its full count. Proxmox’s own example for daily backups with ten years of history is keep-last 3, keep-daily 13, keep-weekly 8, keep-monthly 11 and keep-yearly 9. The official prune simulator shows what any combination keeps before you commit to it.
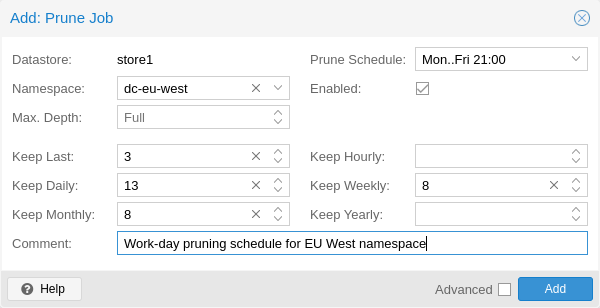
Then set the GC schedule in the same tab. The documentation suggests weekly as a good starting interval. Schedule prune before GC so the GC run can reclaim what the prune released:
proxmox-backup-manager prune-job create backup-daily --store backup \
  --schedule 'daily' --keep-last 3 --keep-daily 13 --keep-weekly 8 --keep-monthly 11

proxmox-backup-manager datastore update backup --gc-schedule 'sat 03:00'
proxmox-backup-manager garbage-collection start backup
proxmox-backup-manager garbage-collection status backup
One privacy note from the docs: deleting a sensitive file from a VM does not remove it from older backups. It lives in chunks until every snapshot that referenced it is pruned and a later GC run has passed the grace period.
Step 7: Add a verify job and test a restore
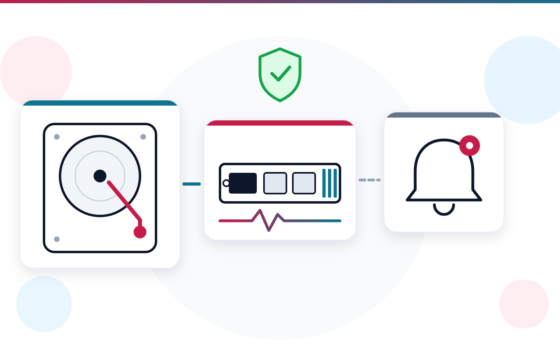
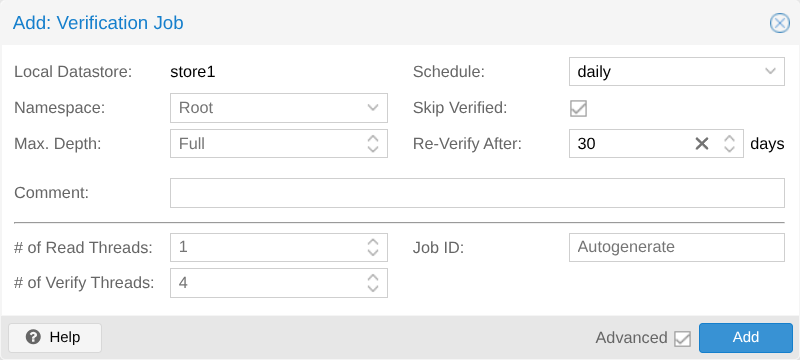
Disks degrade quietly. A verify job re-reads chunks and checks them against their SHA-256 checksums, so a backup that has rotted on disk is flagged long before you need it. Proxmox recommends a frequent job for new snapshots plus re-verifying everything at least monthly, even if earlier checks passed.
Open the datastore’s Verify Jobs tab and add a job with a daily schedule, Skip Verified enabled and Re-Verify After set to 30 days. That one job checks every new snapshot the night it lands and walks through the whole history once a month. Since version 4.1 you can also tune read and verify threads (defaults are 1 reader and 4 verify threads, up to 32 each), which helps on fast SSD datastores.
proxmox-backup-manager verify-job create backup-verify --store backup \
  --schedule 'daily' --ignore-verified true --outdated-after 30
Verification proves the bytes match what was written, not that the guest boots. Proxmox’s ransomware guidance recommends test restores to a new guest, never over the existing one. Once a month, restore one VM to a spare ID with the network disconnected and check it starts. On the backup storage in Proxmox VE, File Restore lets you browse a backup and download single files, and live-restore starts a restored VM immediately while data copies in the background, at reduced disk read speed until it finishes.
Step 8: Send an off-site copy
A datastore in the same room as the server it protects does not survive a fire, a theft or a power surge that takes out both machines. Proxmox Backup Server 4.2 offers four ways to get a copy elsewhere:
| Method | How it works | Best for |
|---|---|---|
| Pull sync job | A second backup server off-site connects to yours and pulls new chunks on a schedule | A friend’s or family member’s house, or a second site you control |
| Push sync job | Your server sends snapshots to a remote backup server; in 4.2 it can encrypt unencrypted snapshots on the way out | A rented or less trusted remote Proxmox Backup Server |
| S3 datastore | The datastore lives in an S3-compatible bucket with a 64 to 128 GiB local cache; officially supported since 4.2 | Cloud object storage such as AWS S3, Cloudflare R2 or a self-hosted S3 store |
| Removable datastore | A USB disk with a datastore that mounts, syncs and unmounts automatically | A rotating drive you carry to work or a relative’s home |
Pull sync is the most ransomware-resistant layout, because the off-site server holds the credentials and your home network has no login to it. On the home server, create a user such as sync@pbs with the DatastoreReader role on /datastore/backup. On the off-site server, add your home server under Configuration > Remotes with its address, that user, its password and the fingerprint, then add a sync job on the off-site datastore:
proxmox-backup-manager remote create home --host home.example.net \
  --userid sync@pbs --password 'SECRET' --fingerprint 'AA:BB:CC:...'

proxmox-backup-manager sync-job create home-pull --remote home \
  --remote-store backup --store offsite --schedule 'daily 04:30' --rate-in 20MiB
Leave Remove vanished off. Proxmox’s ransomware section points out that if the source deletes snapshots, a sync with that option would delete them off-site too. Give the off-site server its own prune, GC and verify jobs instead, ideally with longer retention than home.
Push sync is the reverse: add the remote on your home server, then create a sync job with direction Push. Proxmox advises a dedicated remote user per push job, because pushed groups are owned by that user and jobs sharing one could remove each other’s snapshots. New in 4.2, a push job can be assigned an encryption key so plain snapshots are encrypted before they reach the remote, and the new worker-threads option (up to 32) syncs several backup groups in parallel to speed up high-latency links.
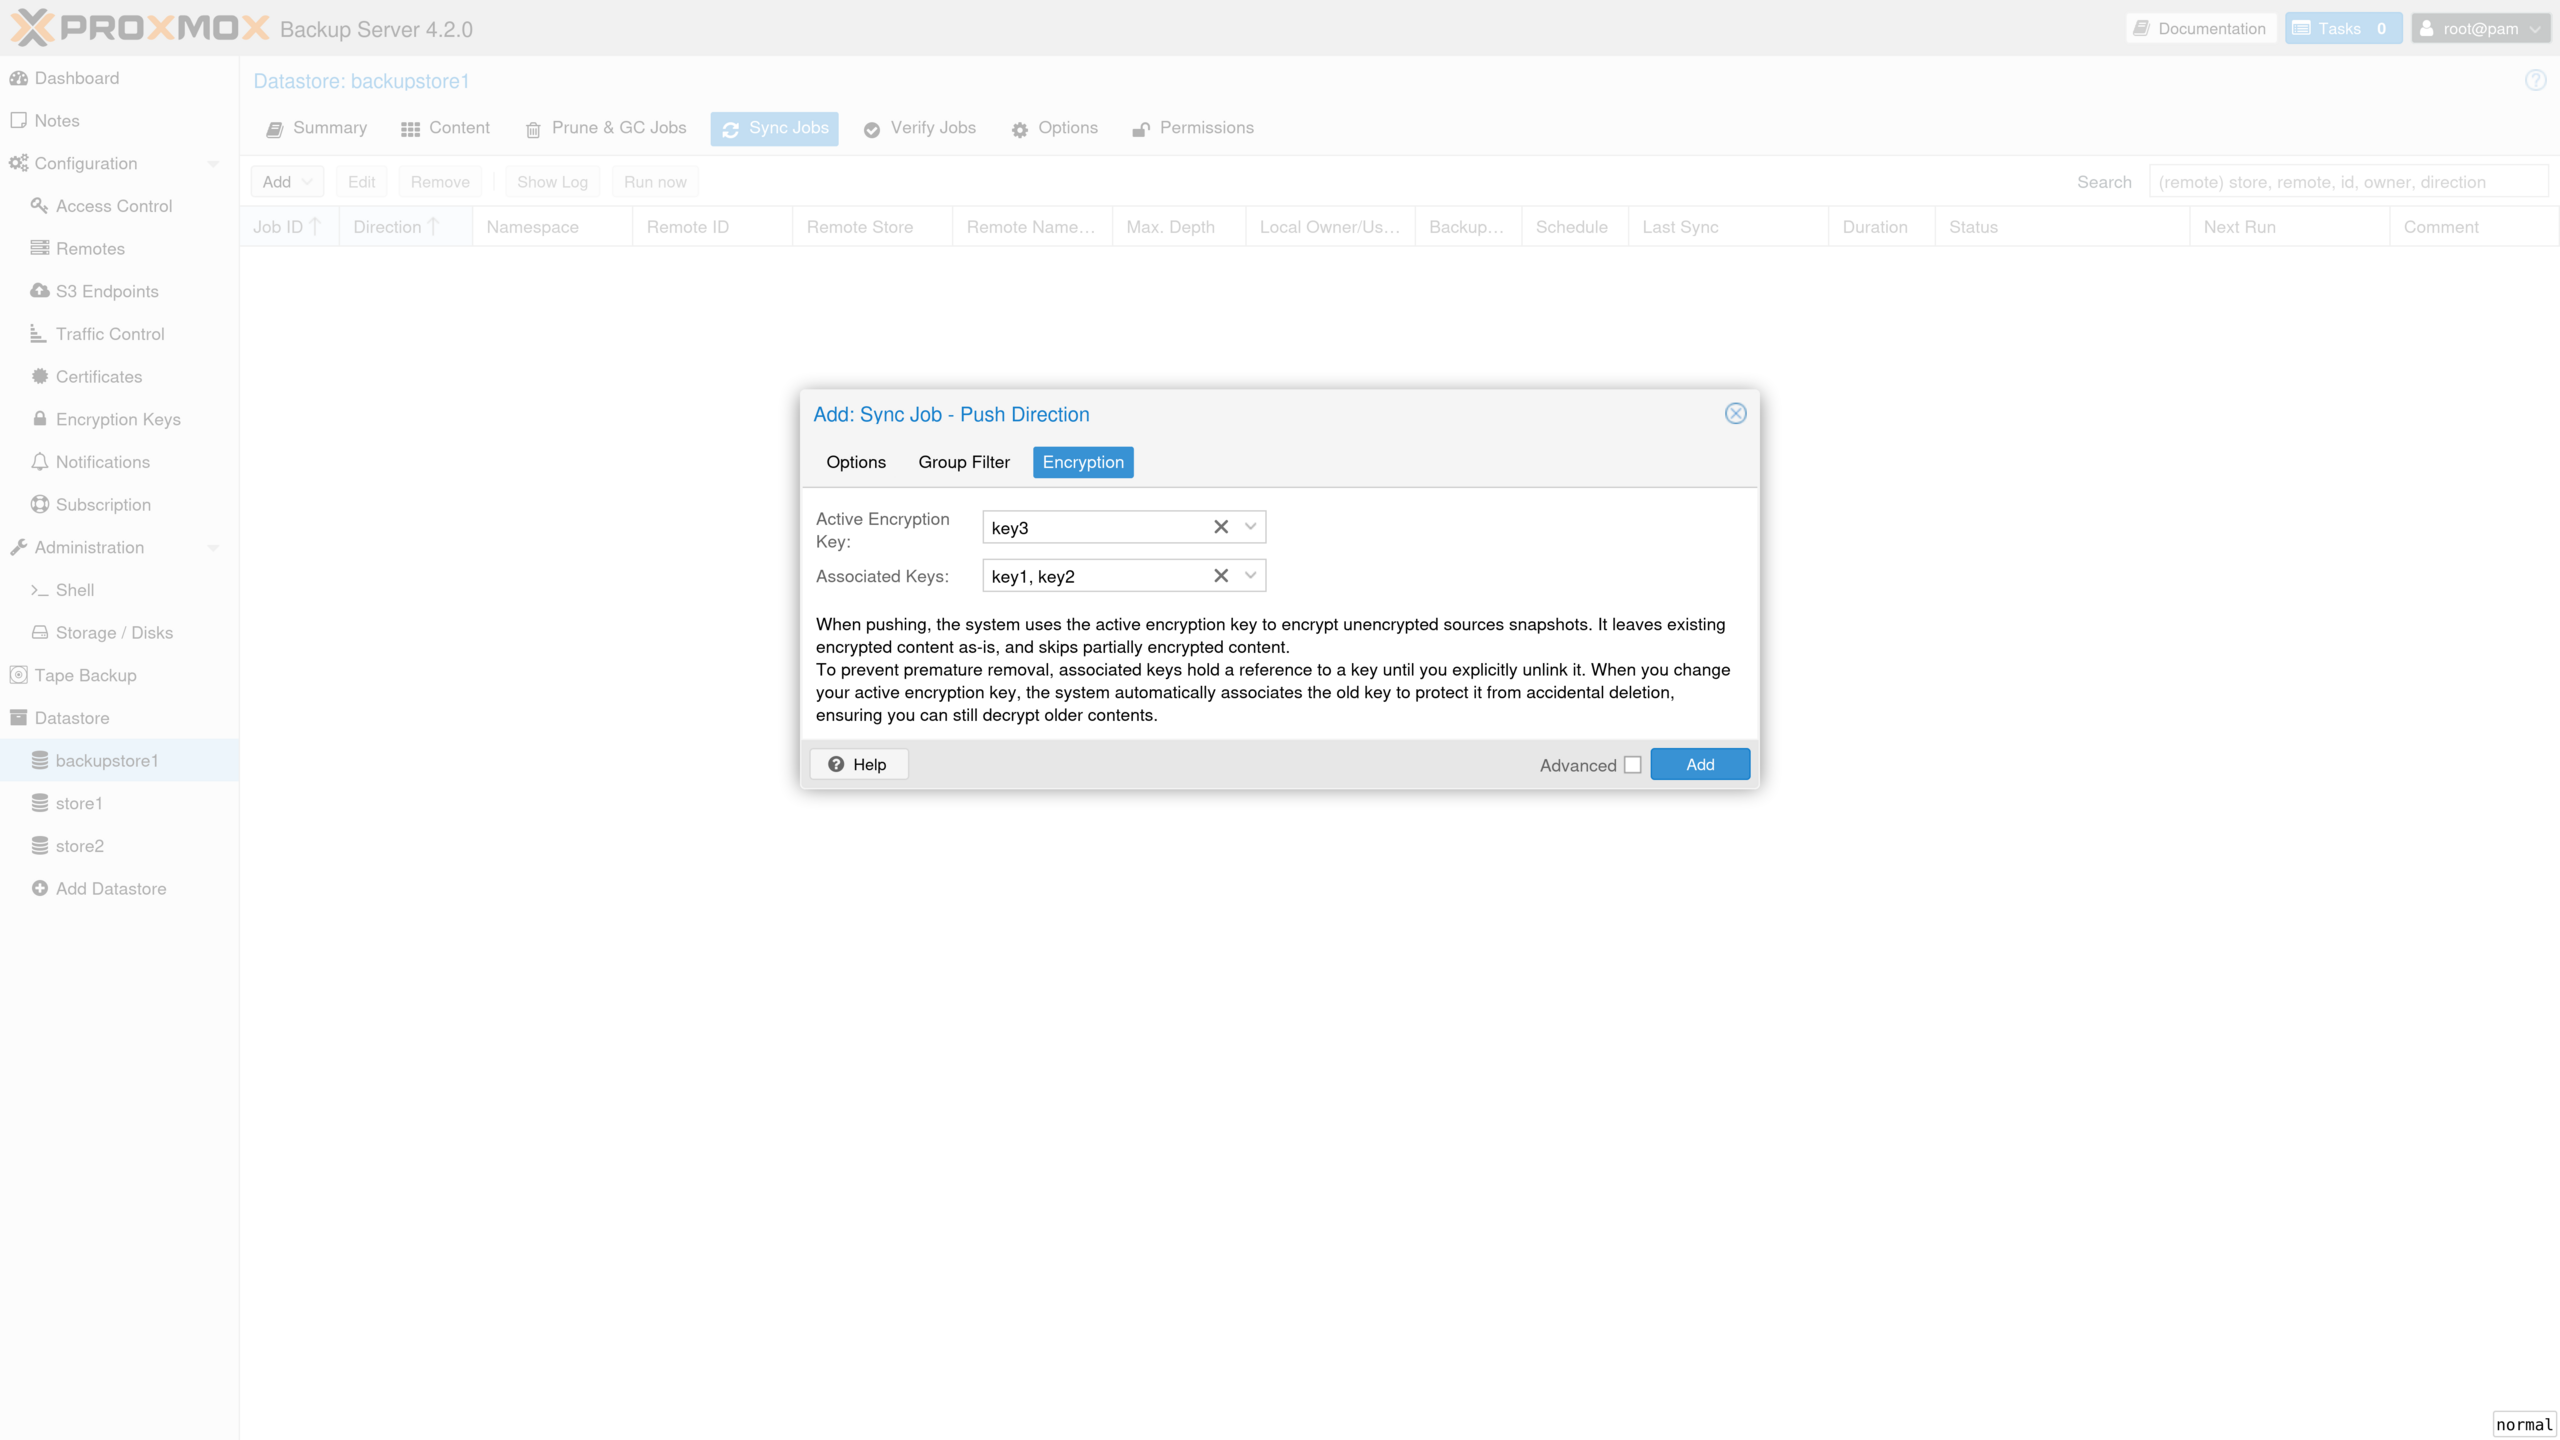
An S3 datastore needs a bucket and access key created at your provider first; Proxmox Backup Server does not create buckets. Add the endpoint under Configuration > Remotes > S3 Endpoints, then create a datastore with the S3 backend and a local cache path, ideally a dedicated disk or a ZFS dataset with a quota:
proxmox-backup-manager s3 endpoint create my-s3 --access-key 'KEY' --secret-key 'SECRET' \
  --endpoint '{{bucket}}.s3.{{region}}.amazonaws.com' --region eu-central-1

proxmox-backup-manager datastore create cloud /mnt/datastore/cloud-cache \
  --backend type=s3,client=my-s3,bucket=my-pbs-bucket
A sync job with no remote set copies between two datastores on the same server, so a local-to-S3 job keeps the cloud copy current. Watch costs: the documentation warns that providers may bill storage, API requests and egress, and version 4.2 added request and traffic counters on the datastore summary with notification thresholds for exactly this reason. Cloudflare R2 needs path-style addressing and region auto.
Removable datastores suit a USB drive rotation. Create one on the drive from Administration > Storage / Disks > Directory, then a local sync job with run-on-mount. Add unmount-on-done to unmount the drive when the sync finishes, and the gc-on-unmount datastore option (new in 4.2) to run garbage collection first.
Get alerts when a job fails
Silent failures are the real enemy of backups. Proxmox Backup Server can notify you about verify, garbage collection, sync and prune results through targets under Configuration > Notifications: sendmail, SMTP, Gotify or a webhook, with matchers that decide which events go where. A webhook pointed at ntfy or a chat service works well for a home setup. Proxmox VE sends its own backup job notifications too, configured in the job’s Notification field and under Datacenter > Notifications.
For an outside view, an Uptime Kuma HTTP monitor on https://YOUR-IP:8007 tells you when the backup server itself is down, which no internal notification can do.
My take
For anyone already running Proxmox VE, Proxmox Backup Server is the easy recommendation: it is free, it uses far less disk than vzdump archives, and features such as single-file restore and live-restore make restores much less painful. The parts that actually protect you are not on by default, though. A backup-only token, server-side pruning, a monthly re-verify and an off-site pull sync turn a convenient backup box into one that survives a dead host or a compromised hypervisor. If you can only add one thing after the basic install, make it the off-site copy.
FAQ
Can I run Proxmox Backup Server as a VM on the Proxmox VE host it backs up?
You can, but Proxmox says installing the backup server directly on the hypervisor is not recommended, and the same logic applies to a VM on that host: if the host fails, the backups go with it. If a VM is all you have today, give it a datastore on separate physical disks and make the off-site sync a priority.
Do I need a paid subscription?
No. The software is free and the no-subscription repository receives updates. Proxmox describes that repository as suitable for testing and non-production use, with the enterprise repository and support available through a subscription.
Can it back up machines that are not on Proxmox VE?
Yes, for Linux. The proxmox-backup-client tool works on most modern Linux systems and does file-level backups of hosts to the same deduplicated datastore. Clients for other operating systems are listed on Proxmox’s roadmap, so there is no official Windows or macOS client yet.
Do I still need restic or another tool?
For guests, Proxmox Backup Server plus an off-site sync gives you a second copy. Check that the copies and storage locations also meet your backup policy. Many people keep restic or a similar tool for data that lives outside VMs, such as a NAS share, or for a copy in a completely different format, which protects against a bug in any single backup system.